
There’s something truly special about making your own ice cream at home, and this Easy Homemade Oreo Ice Cream is the perfect treat to indulge in without the hassle. With just a few simple ingredients like heavy cream, condensed milk, and, of course, Oreo cookies, you can create a creamy, indulgent dessert that’s sure to satisfy any sweet tooth. The best part? It’s no-churn, meaning you don’t need an ice cream maker to achieve that smooth, rich texture. Whether you’re looking to impress guests or just want a quick, homemade dessert for your family, this Oreo ice cream is the ultimate frozen treat that’s as fun to make as it is to enjoy. Ready to dive in and treat yourself to this deliciously simple recipe? Let’s get started!
Table of Contents
Key Benefits of Homemade Oreo Ice Cream
Making Oreo ice cream at home isn’t just about enjoying a delicious frozen treat—it’s about creating something special with minimal effort. Here’s why this recipe stands out:
- No Churn, No Fuss: One of the best things about this Oreo ice cream is that it’s no-churn, meaning you don’t need an ice cream maker. You can whip it up in minutes and let the freezer do the hard work, making it perfect for busy days when you’re craving a sweet indulgence.
- Customizable: While this recipe calls for classic Oreos, you can easily get creative with your mix-ins. Add in other cookies, candy pieces, or even a swirl of fudge to make it your own. The possibilities are endless!
- Creamy & Indulgent: The blend of heavy cream and condensed milk gives this ice cream a rich, velvety texture that’s hard to beat. Unlike some store-bought versions, this homemade treat is made with love and premium ingredients, ensuring a smoother, creamier result.
- Faster Than You Think: Forget about spending hours in the kitchen. In just a few minutes of preparation time, you’ll have your ice cream ready to chill and set. It’s a quick and easy dessert that can be ready in no time!
- Perfect for Sharing: Whether it’s a weekend gathering, a family dinner, or a cozy night in, this Oreo ice cream is a crowd-pleaser. It’s simple enough for a casual treat but fancy enough to impress guests.
So, why not skip the store-bought version next time? This homemade Oreo ice cream will bring that extra touch of deliciousness to your day
Pro Tips and Variations
Want to take your homemade Oreo ice cream to the next level? Here are some expert tips and fun variations to help you customize this creamy treat to your liking.
Pro Tips for the Perfect Texture
- Crush, Don’t Pulverize: For the best texture, break your Oreo cookies into bite-sized chunks rather than grinding them into fine crumbs. This ensures a delightful crunch in every scoop.
- Gently Fold, Don’t Overmix: When combining the crushed Oreos with the ice cream base, use a gentle folding motion to keep the mixture light and airy. Overmixing can deflate the whipped cream, affecting the creaminess.
- Use Chilled Ingredients: For a smoother consistency, make sure your heavy cream is cold before whipping. This helps it reach stiff peaks faster and gives the ice cream a velvety texture.
- Freeze Properly: Cover your ice cream container with plastic wrap before sealing with a lid. This prevents ice crystals from forming and keeps the texture silky smooth.
Delicious Variations to Try
- Double Chocolate Oreo Ice Cream – Mix in chocolate chips or swirl in melted chocolate for an extra indulgent twist.
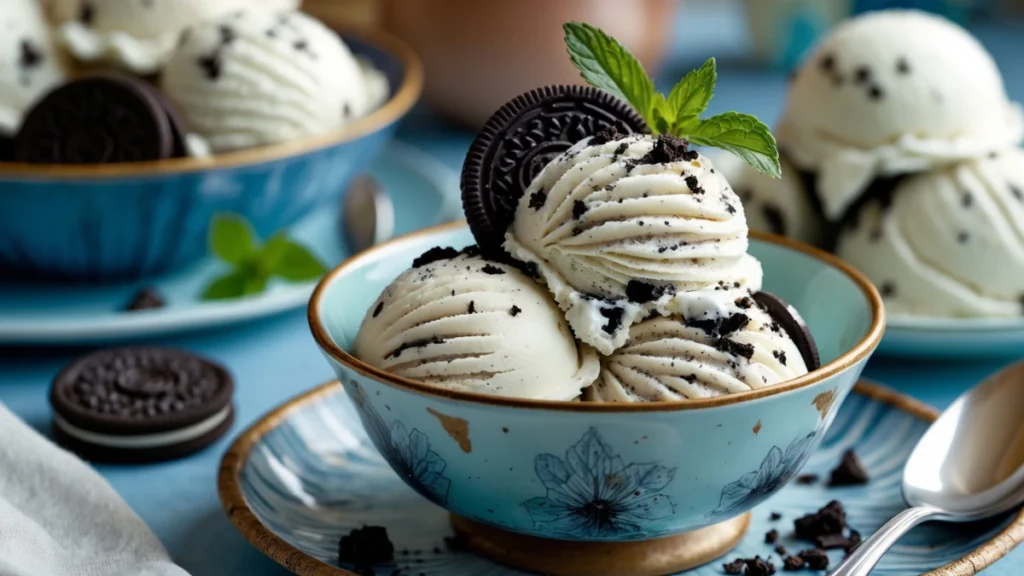
- Mint Oreo Ice Cream – Add ½ teaspoon of peppermint extract to the base and use mint-flavored Oreos for a refreshing flavor.
- Cookies & Cream Cheesecake Ice Cream – Blend in a few tablespoons of cream cheese for a rich, tangy cheesecake-style ice cream.
- Peanut Butter Oreo Ice Cream – Drizzle in melted peanut butter or mix in peanut butter chips for a sweet and salty balance.
- Dairy-Free Alternative – Swap the heavy cream for full-fat coconut milk and use a dairy-free condensed milk alternative for a creamy, vegan-friendly version.
With these tips and variations, you can create your perfect bowl of Oreo ice cream, tailored to your cravings. Get creative and make it your own!
Serving Suggestions
Now that your Oreo ice cream is perfectly frozen and ready to enjoy, let’s talk about the best ways to serve it! Whether you’re keeping it simple or dressing it up for a special occasion, these serving ideas will make every scoop even more delightful.
Classic Ways to Enjoy
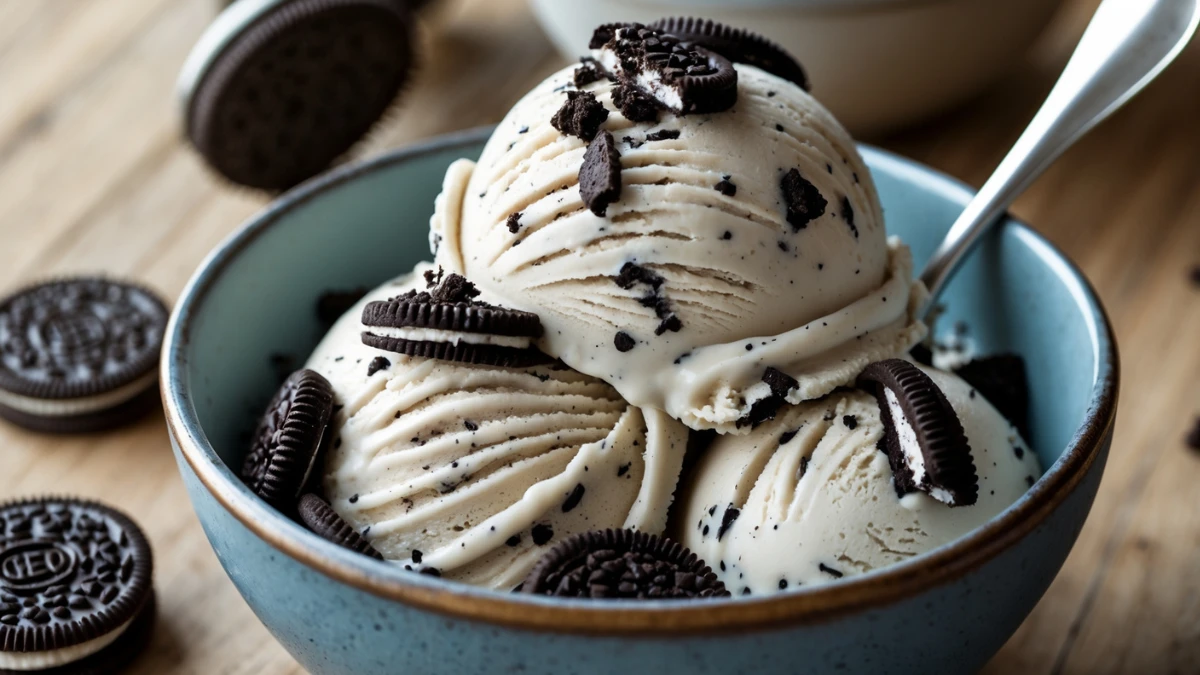
- In a Bowl: Keep it simple by scooping your homemade Oreo ice cream into a bowl and topping it with extra crushed Oreos for a double dose of cookie goodness.
- In a Cone: Serve it in a classic waffle cone or a sugar cone for a nostalgic ice cream shop experience.
- With Whipped Cream: A dollop of fresh whipped cream on top adds an extra creamy touch that complements the cookies and cream flavor.
Creative & Indulgent Pairings
- Drizzle with Chocolate or Caramel Sauce: A swirl of warm chocolate fudge or caramel sauce takes this ice cream to another level of indulgence.
- Make an Oreo Ice Cream Sundae: Layer scoops of ice cream with whipped cream, crushed Oreos, chocolate syrup, and a cherry on top for the ultimate treat.
- Serve with Brownies or Cookies: Pair a scoop of this creamy ice cream with warm brownies or chocolate chip cookies for a decadent dessert combination.
- Turn It into a Milkshake: Blend a few scoops with milk to create a rich and creamy Oreo milkshake—perfect for sipping on a hot day!
Fun Serving Ideas for Special Occasions
- Ice Cream Sandwiches: Scoop the ice cream between two chocolate chip cookies or extra Oreos for a fun handheld dessert.
- Ice Cream Cake Layer: Spread it between cake layers for a homemade cookies and cream ice cream cake that’s perfect for celebrations.
- Frozen Dessert Parfaits: Layer the ice cream with crushed Oreos and whipped cream in a tall glass for an elegant, easy-to-make parfait.
No matter how you serve it, this homemade Oreo ice cream is guaranteed to be a crowd-pleaser. So grab a scoop (or two!) and enjoy every creamy, cookie-filled bite
Oreo Ice Cream – A Dreamy Cookies & Cream Treat
This Oreo ice cream is the perfect balance of creamy and crunchy, making every bite an absolute delight. With its smooth, velvety base and generous chunks of Oreo cookies, it’s a no-churn recipe that’s easy to make and impossible to resist. Whether you’re a die-hard cookies and cream fan or just looking for a quick homemade dessert, this recipe delivers on flavor, texture, and convenience.
What makes this ice cream so special? It’s all about the rich, whipped base that blends seamlessly with the chocolatey crunch of Oreos. Unlike store-bought versions, this homemade treat is made with just a handful of ingredients—no preservatives, no artificial flavors, just pure deliciousness. Plus, it requires minimal effort, so even if you’re new to ice cream-making, you’ll nail this recipe on the first try.
The best part? You can customize it to your heart’s content. Want extra crunch? Fold in more crushed cookies. Love a fudge swirl? Drizzle in some melted chocolate before freezing. However you choose to enjoy it, this Oreo ice cream will quickly become a household favorite.
So, let’s get ready to whip up a batch of this creamy, dreamy goodness—it’s time to make your own cookies and cream magic
Ingredients
Creating this homemade Oreo ice cream is easier than you think! With just a handful of simple ingredients, you can achieve a rich, creamy texture packed with chocolatey cookie goodness. Here’s what you’ll need:
Base Ingredients
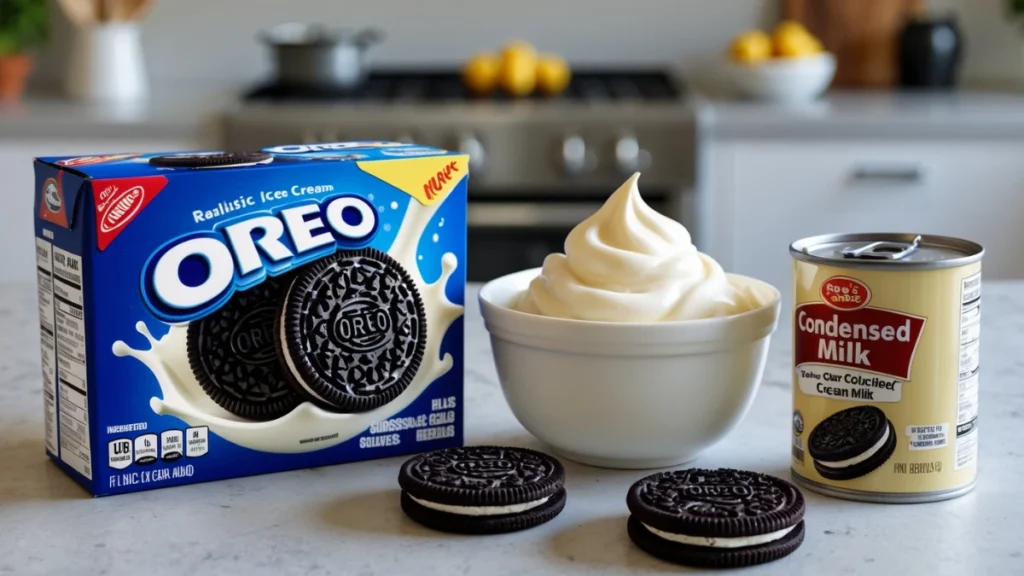
- 2 cups heavy cream – This gives the ice cream its smooth, velvety texture. Be sure to use full-fat for the best results.
- 1 can (14 oz) sweetened condensed milk – Adds sweetness and keeps the ice cream soft and scoopable without needing an ice cream maker.
- 1 teaspoon vanilla extract – Enhances the overall flavor and balances the richness.
Oreo Mix-In
- 10–12 Oreo cookies, crushed – Provides the perfect balance of creamy and crunchy. Adjust the amount based on how cookie-packed you want your ice cream to be!
Optional Add-Ins
- Extra crushed Oreos – For more texture, mix in additional cookie chunks before serving.
- Chocolate chips or fudge drizzle – Add a layer of indulgence with a chocolate swirl or crunchy mix-ins.
- A pinch of salt – A tiny bit of salt enhances the flavors and balances the sweetness.
With these simple ingredients, you’ll be well on your way to making the creamiest, most delicious Oreo ice cream right at home—no ice cream maker required! Now, let’s move on to the easy step-by-step method to bring it all together
Method
Making homemade Oreo ice cream is easy and requires no special equipment, so you can enjoy this delicious treat in no time. Here’s a step-by-step guide to creating this creamy, cookie-filled dessert!
Step 1: Crush the Oreos
- Start by placing the Oreo cookies in a ziplock bag. Use a rolling pin to crush them into a mix of fine crumbs and small chunks.
- Set aside a small portion of crushed Oreos for topping the ice cream later.
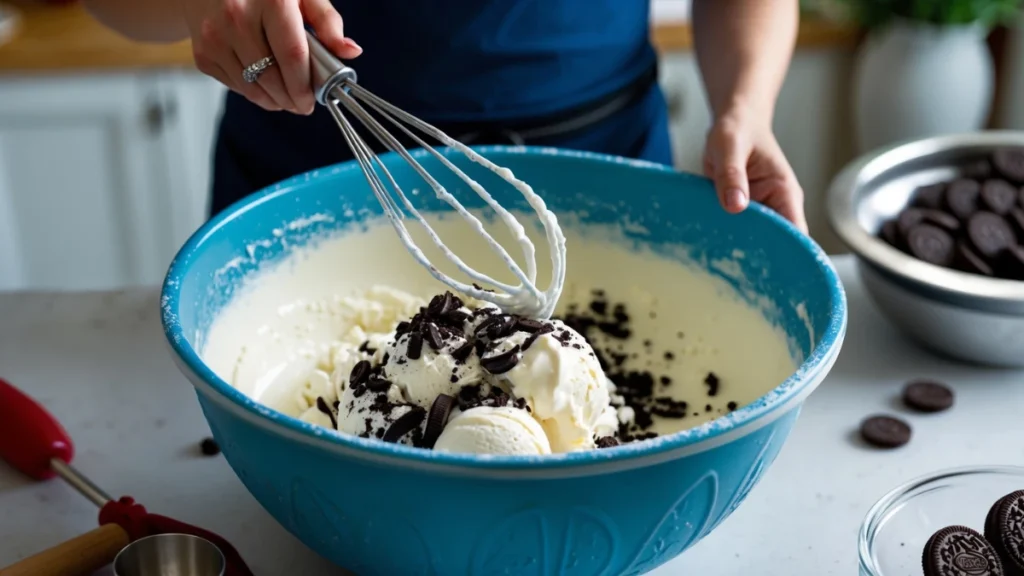
Step 2: Whip the Heavy Cream
- Pour the cold heavy cream into a large mixing bowl.
- Use an electric mixer to beat the cream on medium-high speed until stiff peaks form. This is an essential step for achieving that smooth, airy ice cream texture.
Step 3: Add the Sweetened Condensed Milk
- Once the cream is whipped, gently fold in the sweetened condensed milk.
- Stir in vanilla extract to give the ice cream a rich flavor base. Be careful not to overmix—just enough to combine everything smoothly.
Step 4: Incorporate the Crushed Oreos
- Gently fold the crushed Oreos into the ice cream base. Try not to overmix; you want to keep the chunky pieces intact for that classic Oreo bite.
Step 5: Freeze the Ice Cream
- Transfer the mixture into a freezer-safe container and spread it out evenly.
- Sprinkle the reserved Oreo crumbs on top for a crunchy finish.
- Cover the container tightly with plastic wrap or a lid to prevent ice crystals from forming.
Step 6: Freeze and Serve
- Freeze the ice cream for at least 6 hours or overnight to set completely.
- Before serving, let the ice cream sit out for a few minutes to soften slightly for easy scooping.
- Serve in a bowl, cone, or as a topping for your favorite desserts!
This simple no-churn Oreo ice cream recipe results in a creamy, cookie-packed treat that’s sure to impress. Enjoy it with family and friends, or savor it all to yourself
Conclusion
Congratulations, you’ve just made the most delicious homemade Oreo ice cream! With its creamy texture and the perfect amount of crunchy Oreo goodness, this dessert is sure to satisfy any sweet tooth. Whether you’re serving it at a party, enjoying it on a hot summer day, or indulging as a late-night treat, this simple no-churn ice cream recipe is a hit every time.
It’s the ultimate easy dessert—no ice cream maker required, and only a few ingredients needed. The best part? You can customize it by adding in extra ingredients like chocolate chips, crushed candy bars, or even a swirl of caramel for a fun twist on this classic treat.
Keep it in the freezer for up to 2 weeks (if it lasts that long!) or serve it immediately for the freshest flavor.
We hope you loved making this simple, creamy Oreo ice cream. Let us know how it turned out by sharing your experience and any fun twists you added in the comments below. Enjoy every scoop, and happy eating
———————————————-

Oreo Ice Cream
Ingredients
Base Ingredients
- 2 cups heavy cream – This gives the ice cream its smooth velvety texture. Be sure to use full-fat for the best results.
- 1 can 14 oz sweetened condensed milk – Adds sweetness and keeps the ice cream soft and scoopable without needing an ice cream maker.
- 1 teaspoon vanilla extract – Enhances the overall flavor and balances the richness.
Oreo Mix-In
- 10 –12 Oreo cookies crushed – Provides the perfect balance of creamy and crunchy. Adjust the amount based on how cookie-packed you want your ice cream to be!
Optional Add-Ins
- Extra crushed Oreos – For more texture mix in additional cookie chunks before serving.
- Chocolate chips or fudge drizzle – Add a layer of indulgence with a chocolate swirl or crunchy mix-ins.
- A pinch of salt – A tiny bit of salt enhances the flavors and balances the sweetness.
Instructions
Step 1: Crush the Oreos
- Start by placing the Oreo cookies in a ziplock bag. Use a rolling pin to crush them into a mix of fine crumbs and small chunks.
- Set aside a small portion of crushed Oreos for topping the ice cream later.
Step 2: Whip the Heavy Cream
- Pour the cold heavy cream into a large mixing bowl.
- Use an electric mixer to beat the cream on medium-high speed until stiff peaks form. This is an essential step for achieving that smooth, airy ice cream texture.
Step 3: Add the Sweetened Condensed Milk
- Once the cream is whipped, gently fold in the sweetened condensed milk.
- Stir in vanilla extract to give the ice cream a rich flavor base. Be careful not to overmix—just enough to combine everything smoothly.
Step 4: Incorporate the Crushed Oreos
- Gently fold the crushed Oreos into the ice cream base. Try not to overmix; you want to keep the chunky pieces intact for that classic Oreo bite.
Step 5: Freeze the Ice Cream
- Transfer the mixture into a freezer-safe container and spread it out evenly.
- Sprinkle the reserved Oreo crumbs on top for a crunchy finish.
- Cover the container tightly with plastic wrap or a lid to prevent ice crystals from forming.
Step 6: Freeze and Serve
- Freeze the ice cream for at least 6 hours or overnight to set completely.
- Before serving, let the ice cream sit out for a few minutes to soften slightly for easy scooping.
- Serve in a bowl, cone, or as a topping for your favorite desserts!
Notes
- Calories: 300
- Fat: 18g
- Saturated Fat: 10g
- Carbohydrates: 34g
- Sugars: 28g
- Protein: 3g
- Cholesterol: 60mg
- Sodium: 50mg
- Fiber: 2g
FAQs
1. How long does homemade Oreo ice cream last in the freezer?
Your homemade Oreo ice cream can stay fresh in the freezer for up to 2 weeks. Just make sure it’s tightly covered to prevent ice crystals from forming and maintain that creamy texture.
2. Can I make this Oreo ice cream without an electric mixer?
Yes! If you don’t have an electric mixer, you can whip the heavy cream by hand using a whisk. Just be prepared for a bit of a workout—it’ll take a little longer, but it will still work!
3. Can I use different cookies instead of Oreos?
Absolutely! While Oreo cookies are classic, feel free to experiment with other cookie varieties like chocolate chip cookies or peanut butter cookies for a fun twist. Just be sure to crush them into small pieces for even distribution.
4. How can I make the ice cream even creamier?
For an even richer ice cream, you can substitute half-and-half for the heavy cream, or add a tablespoon of cream cheese to the mixture to enhance the texture. If you want extra creaminess, you can also add a bit of whole milk to balance things out.
5. Do I need to let the ice cream sit out before serving?
Yes, letting the ice cream sit out for a few minutes before serving helps soften it, making scooping easier. Just don’t wait too long—this ice cream is best served at the perfect, slightly soft texture!
These Oreo ice cream FAQs will help you navigate the process and troubleshoot if needed. Don’t hesitate to experiment and enjoy every scoop of your homemade creation