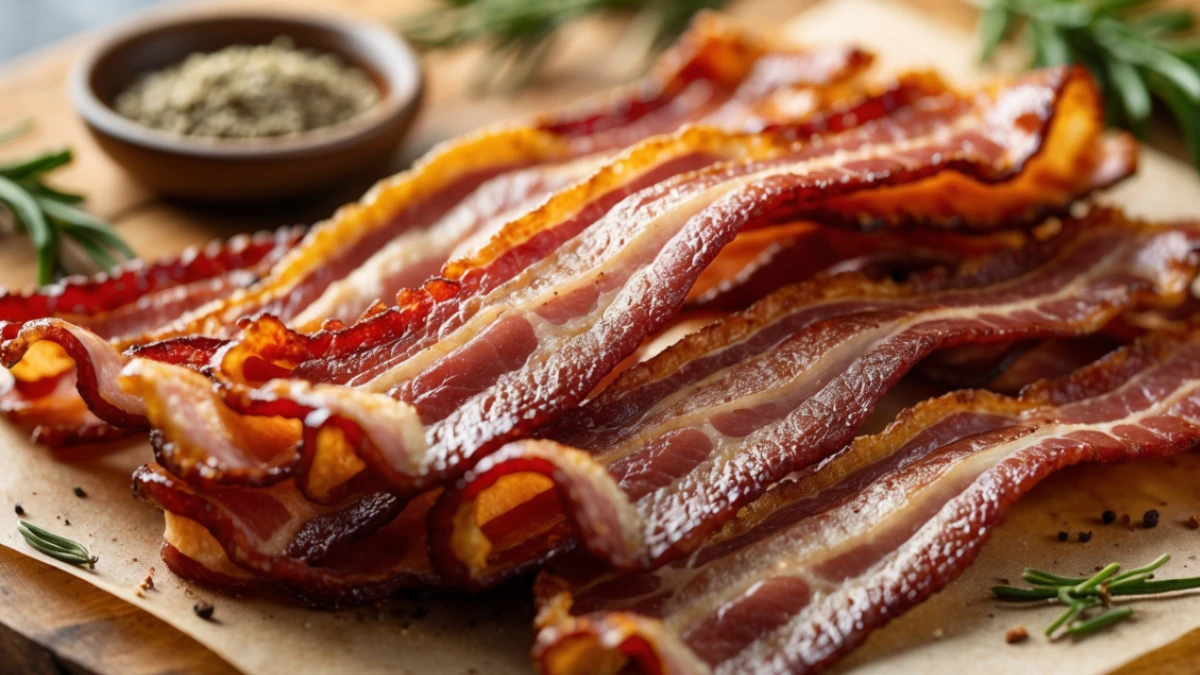
There’s something incredibly satisfying about making your own beef bacon at home. Have you ever wondered how to achieve that perfect balance of smoky, savory, and crispy goodness—without relying on store-bought options? Whether you’re looking for a nitrate-free alternative, a flavor-packed breakfast staple, or simply a fun DIY project, this homemade beef bacon recipe gives you complete control over taste and texture. With just a few ingredients and some patience, you’ll transform beef belly into rich, smoky strips that rival traditional bacon. Ready to master the art of curing and crisping your own beef bacon? Let’s dive in!
Table of Contents
Key Benefits of Making Beef Bacon at Home
Making homemade beef bacon isn’t just about replicating a classic favorite—it’s about creating a customized, high-quality alternative that fits your taste and dietary preferences. Here’s why it’s worth the effort:
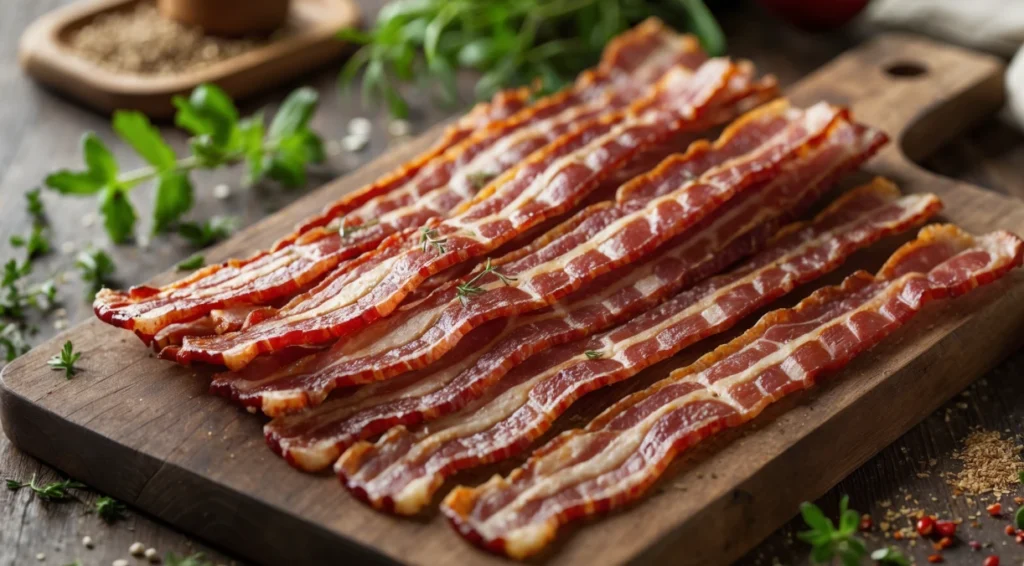
- Healthier Alternative – By making your own beef bacon, you control the ingredients, allowing you to skip artificial preservatives and adjust the salt and sugar levels to your preference. Want a nitrate-free option? You’ve got it!
- Rich, Smoky Flavor – Unlike store-bought versions, home-cured beef bacon lets you experiment with flavors, from deep smoky paprika to bold garlic and black pepper seasoning.
- Perfect Texture – Whether you prefer crispy strips or thicker, meaty bites, you can slice and cook it exactly how you like.
- Budget-Friendly – Buying beef belly and curing it yourself is often more affordable than pre-packaged alternatives, making it a cost-effective way to enjoy gourmet-quality bacon.
- Versatile Uses – Beyond breakfast, crispy beef bacon elevates everything from burgers and sandwiches to salads and wraps, adding a smoky, savory crunch to your favorite meals.
By making your own DIY beef bacon, you unlock endless possibilities for flavor, texture, and creativity in the kitchen. Ready to get started? Let’s break down the ingredients you’ll need
Ingredients for Homemade Beef Bacon
Creating beef bacon from scratch is simpler than you might think! With just a few key ingredients, you can achieve that signature smoky, savory flavor and perfect texture. Here’s what you’ll need:
Main Ingredient:
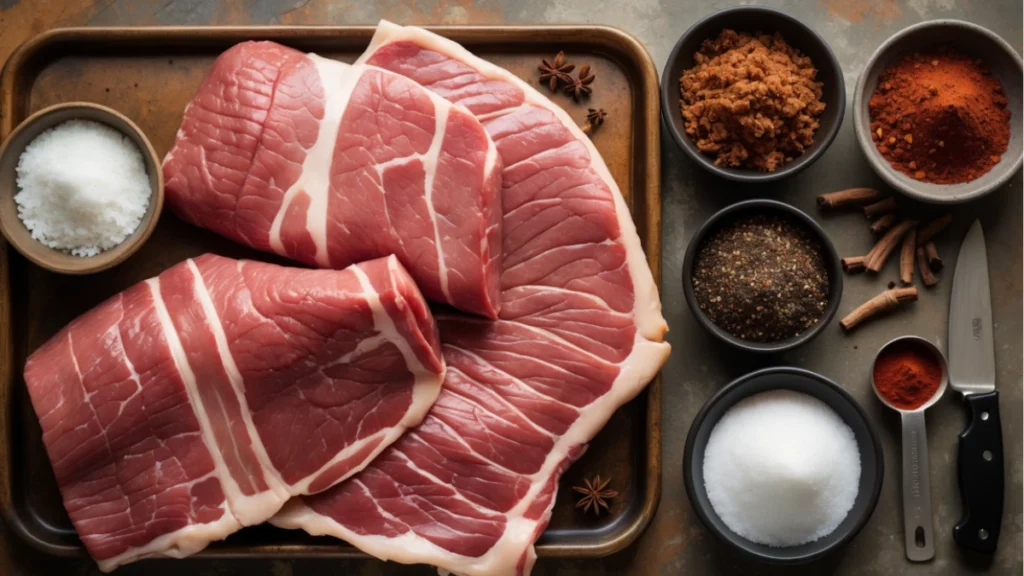
- Beef Belly (2–3 lbs) – The best cut for homemade beef bacon, offering the perfect balance of fat and meat for rich flavor and crispiness.
Curing Blend:
- Kosher Salt (2 tbsp) – Essential for drawing out moisture and enhancing flavor.
- Pink Curing Salt (¼ tsp, optional) – Helps preserve the meat and deepen the traditional bacon taste. Skip for a nitrate-free version.
- Brown Sugar (2 tbsp) – Adds a hint of sweetness and balances the saltiness.
- Smoked Paprika (1 tsp) – Boosts the smoky depth, even if you’re not using a smoker.
- Black Pepper (1 tsp, freshly ground) – Provides a bold, slightly spicy kick.
- Garlic Powder (1 tsp) – Enhances the umami flavor profile.
For Extra Smokiness (Optional):
- Liquid Smoke (1 tbsp) – A great substitute if you don’t have a smoker.
- Maple Syrup or Honey (1 tbsp) – Adds a subtle sweetness and caramelized finish.
Pro Tip:
If you prefer a spicier beef bacon, try adding a dash of cayenne pepper or chipotle powder for extra heat!
With these carefully selected ingredients, you’re all set to begin the curing process. Let’s move on to the step-by-step method!
Method for Making Homemade Beef Bacon
Now that you have your ingredients ready, let’s walk through the simple process of turning beef belly into delicious beef bacon. Patience is key, but the results are totally worth it! Here’s how to do it:
Step 1: Prepare the Cure
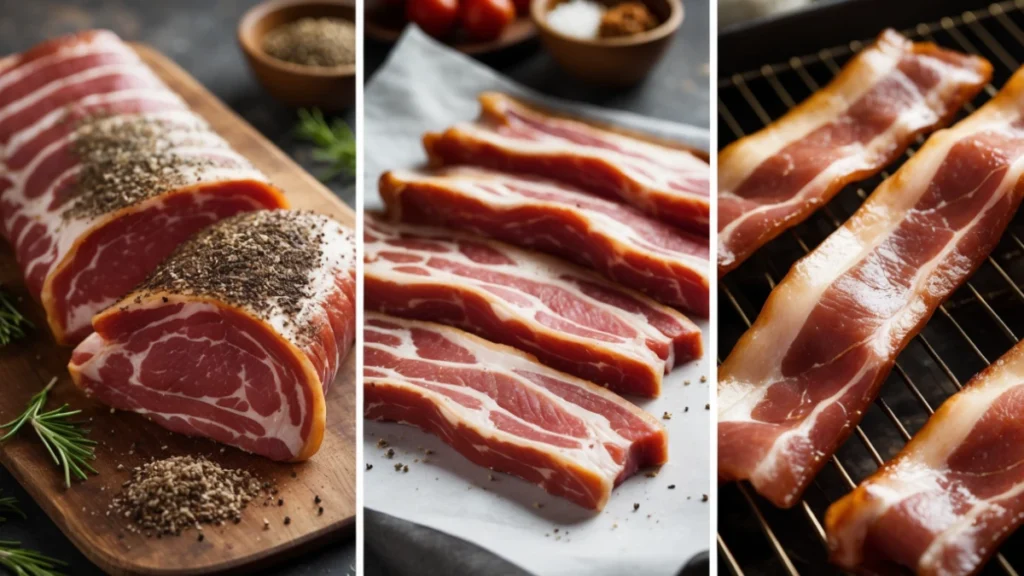
In a small bowl, combine your kosher salt, pink curing salt (if using), brown sugar, smoked paprika, black pepper, and garlic powder. Mix everything thoroughly until well combined. This is the flavor base for your bacon, so don’t rush this step!
Step 2: Coat the Beef Belly
Lay the beef belly flat on a clean surface. Gently rub the curing mixture all over the meat, ensuring it’s evenly coated. Don’t forget to cover the edges as well! The cure will draw out moisture, so make sure it’s thoroughly absorbed into the meat.
Step 3: Wrap and Refrigerate
Once the meat is coated, wrap it tightly in plastic wrap. Place it in a shallow pan or dish to catch any liquids that may be released during the curing process. Refrigerate the beef belly for at least 5 days, flipping it once a day. This curing period is essential for achieving that classic beef bacon flavor.
Step 4: Rinse and Dry
After 5 days, remove the beef belly from the fridge and rinse off any excess cure under cold water. Pat the meat dry with paper towels—this step is crucial for getting a crispy finish when you cook the bacon.
Step 5: Smoke or Oven Cook
You have two options for cooking your homemade beef bacon:
- Smoking Method (Preferred for Flavor):
- Preheat your smoker to around 200°F (95°C).
- Place the beef belly on the smoker rack, fat side up.
- Smoke for 2–3 hours or until the internal temperature reaches 150°F (65°C). The longer you smoke, the richer the flavor!
- Oven Method (Quick and Easy):
- Preheat your oven to 275°F (135°C).
- Place the beef belly on a baking rack over a lined sheet pan, fat side up.
- Bake for 2.5–3 hours, checking periodically until the internal temperature hits 150°F (65°C).
Step 6: Let it Rest
Once cooked, let the beef bacon cool slightly before slicing. Resting allows the juices to redistribute, ensuring your bacon stays juicy yet crispy when you cut it.
Step 7: Slice and Enjoy
For the best results, slice the bacon thinly with a sharp knife. You’ll get that crispy, melt-in-your-mouth texture perfect for any meal. Fry the slices in a pan for extra crispness if desired!
Pro Tip:
If you want to add a little sweetness to your bacon, brush it with maple syrup or honey during the last 10 minutes of cooking for a caramelized finish.
Now you’re all set to enjoy your homemade beef bacon in all its smoky, savory glory! Let’s talk about some creative ways to serve it
Pro Tips and Variations for Homemade Beef Bacon
Making your own beef bacon gives you plenty of room to get creative. Once you master the basic process, you can experiment with different flavors, textures, and techniques to make it truly your own. Here are some pro tips and variations to elevate your DIY beef bacon:
Pro Tips for Perfect Bacon
- Use a Sharp Knife for Slicing – When it comes to slicing your bacon, a sharp knife is your best friend. For thin, even slices, make sure your knife is well-maintained and use smooth, steady motions. If you prefer extra crispiness, cut your bacon into thicker strips before cooking.
- Patience Pays Off – While the cooking process doesn’t take too long, the curing stage is crucial. Don’t rush the refrigeration period. The longer the cure sits, the more intense and flavorful the beef bacon will be.
- Temperature is Key – Whether smoking or oven-cooking, keep an eye on the internal temperature. Aim for 150°F (65°C) for that perfect balance of tender and crispy. Using a meat thermometer will help you avoid under- or overcooking.
Flavor Variations to Try
- Sweet and Smoky – Add a touch of brown sugar or maple syrup to the curing mixture for a subtly sweet flavor that contrasts beautifully with the smoky bacon. You can also drizzle some honey over the bacon during the last few minutes of cooking for a caramelized finish.
- Spicy Kick – Want to turn up the heat? Add a pinch of cayenne pepper or chipotle powder to the curing mix for a smoky, spicy twist. This variation pairs perfectly with a tangy dipping sauce or on top of a spicy avocado toast.
- Herb-Infused Bacon – For a fresh, earthy flavor, try adding finely chopped rosemary, thyme, or oregano to the cure. The herbs add a lovely fragrance and depth of flavor that pairs wonderfully with eggs, sandwiches, or roasted vegetables.
Storage Tips
Once your beef bacon is cooked and cooled, you can store it in an airtight container or zip-top bag in the fridge for up to 1 week. If you’ve made a big batch, consider freezing the slices for longer storage. Just make sure to separate each slice with parchment paper to prevent them from sticking together. When you’re ready to use, simply reheat the slices in a skillet or microwave for that crispy texture.
For a More Smoky Flavor
If you don’t have a smoker, liquid smoke is a great option. Just a tablespoon added to your cure will give your bacon a rich, smoky depth. Alternatively, you can use wood chips on the grill or even a stovetop smoker for that classic smoky aroma.
With these pro tips and flavor variations, you’ll be able to perfect your beef bacon and keep things exciting every time you make it. Ready to serve up some delicious bites? Let’s explore a few ideas on how to enjoy your homemade creation
Serving Suggestions for Your Homemade Beef Bacon
Now that you’ve made your own delicious beef bacon, it’s time to explore all the amazing ways you can enjoy it. This smoky, savory treat is incredibly versatile and can elevate almost any meal. Here are some creative and delicious serving suggestions:
1. Classic Breakfast Combo
Pair your crispy beef bacon with scrambled eggs, avocado toast, or a fluffy stack of pancakes. The smoky richness of the bacon complements the creamy eggs or buttery toast perfectly. If you want to get fancy, serve it alongside some roasted tomatoes or sautéed greens for an extra pop of flavor and color.
2. Beef Bacon Sandwiches
Looking for a hearty lunch? Layer beef bacon on a freshly toasted sandwich. It pairs beautifully with everything from cheddar cheese and pickles to fresh greens and a smear of spicy mayo. Try it with a classic BLT twist or get creative with a roast beef sandwich for a meaty, smoky delight.
3. Wraps and Tacos
Add a few slices of beef bacon to your wraps or tacos for a smoky crunch. It’s a great topping for grilled chicken, shrimp, or even vegetarian wraps with roasted veggies and avocado. Beef bacon adds an unexpected savory bite that elevates any filling.
4. Salads with a Crunch
For a lighter option, toss beef bacon into your favorite salad. Whether it’s a simple spinach salad or a more elaborate wedge salad, the crispy bacon adds a delicious, smoky contrast to the fresh vegetables. Try pairing it with blue cheese or balsamic vinaigrette for a rich, balanced flavor.
5. Top Your Pizza
Why not take your homemade pizza to the next level by adding slices of beef bacon as a topping? It works particularly well with barbecue chicken, roasted vegetables, or even pineapple. The crispy bacon adds texture and a smoky edge to each bite.
6. On Its Own
Sometimes, the best way to enjoy homemade beef bacon is on its own. Serve it as an appetizer or snack, and let the full flavor shine through. A little mustard or hot sauce on the side can give it an extra kick, or you can dip it in a creamy ranch dressing for that perfect salty-sweet balance.
Pro Tip:
For an extra indulgent treat, chop your beef bacon into smaller pieces and toss it into pasta dishes, soups, or even mac and cheese. The bacon bits will melt into the dish, adding depth and richness to every bite.
Whether you’re enjoying it as part of a hearty breakfast, adding it to a fresh salad, or using it as a topping for your favorite pizza, homemade beef bacon is sure to become a go-to ingredient in your kitchen. It’s versatile, flavorful, and always delicious
Conclusion: Why You’ll Love Homemade Beef Bacon
Making your own beef bacon at home is not just about creating a savory snack—it’s about elevating your entire culinary experience. From the rich smoky flavor to the crispy texture, homemade beef bacon adds a personal touch to your meals, offering the perfect balance of convenience, flavor, and satisfaction.
By crafting your own DIY bacon, you’re in control. You can adjust the cure to your taste, experiment with seasonings, and ensure your bacon is free from preservatives or artificial ingredients. Plus, the process of curing and smoking the beef belly is not only rewarding but fun. You’ll find yourself savoring each bite knowing it was made with love and care.
Whether you’re using it to upgrade your breakfast, add a smoky crunch to a salad, or craft the ultimate sandwich, beef bacon is a versatile ingredient that’s sure to become a staple in your kitchen. The best part? You’ll never look at store-bought bacon the same way again.
Ready to give it a try? Gather your ingredients, follow the simple steps, and you’ll soon have homemade beef bacon that’ll impress everyone at your table!
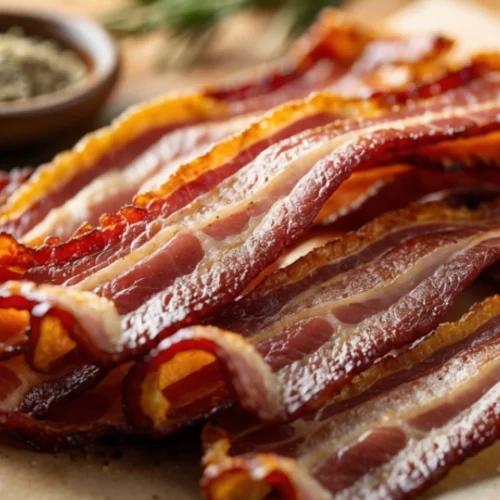
Beef Bacon
Ingredients
Ingredients for Homemade Beef Bacon
- Creating beef bacon from scratch is simpler than you might think! With just a few key ingredients you can achieve that signature smoky, savory flavor and perfect texture. Here’s what you’ll need:
Main Ingredient:
- Beef Belly 2–3 lbs – The best cut for homemade beef bacon, offering the perfect balance of fat and meat for rich flavor and crispiness.
Curing Blend:
- Kosher Salt 2 tbsp – Essential for drawing out moisture and enhancing flavor.
- Pink Curing Salt ¼ tsp, optional – Helps preserve the meat and deepen the traditional bacon taste. Skip for a nitrate-free version.
- Brown Sugar 2 tbsp – Adds a hint of sweetness and balances the saltiness.
- Smoked Paprika 1 tsp – Boosts the smoky depth, even if you’re not using a smoker.
- Black Pepper 1 tsp, freshly ground – Provides a bold, slightly spicy kick.
- Garlic Powder 1 tsp – Enhances the umami flavor profile.
For Extra Smokiness (Optional):
- Liquid Smoke 1 tbsp – A great substitute if you don’t have a smoker.
- Maple Syrup or Honey 1 tbsp – Adds a subtle sweetness and caramelized finish.
Pro Tip:
- If you prefer a spicier beef bacon try adding a dash of cayenne pepper or chipotle powder for extra heat!
Instructions
Method for Making Homemade Beef Bacon
- Now that you have your ingredients ready, let’s walk through the simple process of turning beef belly into delicious beef bacon. Patience is key, but the results are totally worth it! Here’s how to do it:
Step 1: Prepare the Cure
- In a small bowl, combine your kosher salt, pink curing salt (if using), brown sugar, smoked paprika, black pepper, and garlic powder. Mix everything thoroughly until well combined. This is the flavor base for your bacon, so don’t rush this step!
Step 2: Coat the Beef Belly
- Lay the beef belly flat on a clean surface. Gently rub the curing mixture all over the meat, ensuring it’s evenly coated. Don’t forget to cover the edges as well! The cure will draw out moisture, so make sure it’s thoroughly absorbed into the meat.
Step 3: Wrap and Refrigerate
- Once the meat is coated, wrap it tightly in plastic wrap. Place it in a shallow pan or dish to catch any liquids that may be released during the curing process. Refrigerate the beef belly for at least 5 days, flipping it once a day. This curing period is essential for achieving that classic beef bacon flavor.
Step 4: Rinse and Dry
- After 5 days, remove the beef belly from the fridge and rinse off any excess cure under cold water. Pat the meat dry with paper towels—this step is crucial for getting a crispy finish when you cook the bacon.
Step 5: Smoke or Oven Cook
- You have two options for cooking your homemade beef bacon:
- Smoking Method (Preferred for Flavor):
- Preheat your smoker to around 200°F (95°C).
- Place the beef belly on the smoker rack, fat side up.
- Smoke for 2–3 hours or until the internal temperature reaches 150°F (65°C). The longer you smoke, the richer the flavor!
Oven Method (Quick and Easy):
- Preheat your oven to 275°F (135°C).
- Place the beef belly on a baking rack over a lined sheet pan, fat side up.
- Bake for 2.5–3 hours, checking periodically until the internal temperature hits 150°F (65°C).
Step 6: Let it Rest
- Once cooked, let the beef bacon cool slightly before slicing. Resting allows the juices to redistribute, ensuring your bacon stays juicy yet crispy when you cut it.
Step 7: Slice and Enjoy
- For the best results, slice the bacon thinly with a sharp knife. You’ll get that crispy, melt-in-your-mouth texture perfect for any meal. Fry the slices in a pan for extra crispness if desired!
Notes
- Calories: 150
- Protein: 12g
- Fat: 10g
- Carbohydrates: 1g
- Saturated Fat: 4g
- Sodium: 450mg
- Cholesterol: 35mg
FAQs: Your Beef Bacon Questions Answered
Making your own beef bacon can feel like a bit of a process, and you may have some questions as you go. Don’t worry—we’ve got you covered! Here are answers to some of the most frequently asked questions about crafting your very own smoky, savory beef bacon.
1. Can I use a different cut of beef for bacon?
Yes, you can! While beef belly is the go-to cut for making bacon, other cuts like brisket, round, or even flank steak can work too. The fattier the cut, the better your bacon will turn out. If you choose a leaner cut, you may want to add a bit more fat during the curing process to ensure that signature crispy texture and rich flavor.
2. Do I need a smoker to make beef bacon?
Not at all! While smoking adds that signature flavor to your beef bacon, you can skip the smoker and still get great results by using your oven. Simply bake your bacon at a low temperature (around 200°F or 93°C) to ensure it cooks slowly and evenly. If you still want a smoky flavor without a smoker, try adding a bit of liquid smoke or using a grill.
3. How long does homemade beef bacon last?
Homemade beef bacon will stay fresh in the fridge for up to 1 week when stored in an airtight container or wrapped tightly in plastic wrap. For longer storage, you can freeze it. Just be sure to separate the slices with parchment paper before freezing to prevent them from sticking together. You can keep frozen bacon for up to 3 months, so you’ll always have a tasty snack on hand!
4. Can I skip the curing salt?
While pink curing salt (also known as Prague powder) is typically used in the recipe to help preserve color and flavor, it’s not strictly necessary. If you prefer to avoid nitrates, feel free to omit it. However, keep in mind that your bacon may not have that signature deep pink color, and the shelf life may be slightly reduced. It’s still delicious—just a bit different!
5. Can I make beef bacon in advance?
Absolutely! One of the great things about beef bacon is that you can make it ahead of time. After curing and cooking, just store your bacon in the fridge for up to a week, or freeze it for longer storage. Preparing it in advance makes it a convenient ingredient to have on hand for breakfasts, sandwiches, or adding to salads and soups.
6. Can I add other spices to the cure?
Yes! The beauty of homemade beef bacon is the ability to customize the flavors. Feel free to experiment with different seasonings like garlic powder, onion powder, or even a pinch of cayenne pepper for some heat. Herbs like rosemary or thyme can also be added for a fresh, earthy twist. Let your creativity shine!
7. Can I eat beef bacon right after cooking?
Yes, you can enjoy beef bacon immediately after cooking! Whether you want it crispy or slightly tender, just be sure to let it cool slightly to allow the fat to set. If you prefer it extra crispy, you can always cook it a little longer until it reaches your desired level of crunch.
Pro Tip:
If you’ve made a large batch of beef bacon, don’t hesitate to use it in other recipes like pasta dishes, burgers, or quiches. It adds a savory, smoky flavor that will elevate any meal!
Now that you have the answers to your most pressing questions, you’re all set to enjoy your homemade beef bacon journey. Happy cooking
Have you ever tried this recipe?
I tried this recipe and it is absolutely amazing
It’s a great recipe, try it

