

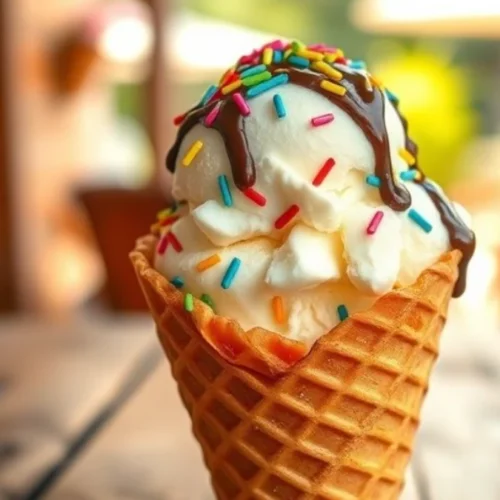
Who doesn’t love a classic ice cream cone? There’s something about the combination of creamy ice cream and a crisp, crunchy cone that makes it the perfect treat, whether you’re cooling off on a hot day or just indulging in a sweet moment. The best part? These Simply Irresistible Ice Cream Cones are incredibly easy to make at home, allowing you to personalize them with your favorite flavors and toppings. Whether you prefer a simple vanilla scoop or enjoy experimenting with decadent chocolate-dipped cones, this recipe has you covered. Gather your ingredients, and let’s create a fun, customizable dessert that’s sure to satisfy your sweet tooth every time. Ready to try it now? Let’s dive in!
Table of Contents
Key Benefits of Making Ice Cream Cones at Home
Making your own ice cream cones comes with a world of benefits beyond just the delicious outcome. Here’s why this simple treat is worth the effort:
- Customizable Flavors & Toppings: When you make your own cones, you have complete control over the flavor combinations. Whether you’re craving a scoop of classic vanilla or something more adventurous like salted caramel or chocolate fudge, you can create your perfect dessert. And don’t forget the toppings! Add everything from sprinkles to fresh fruit or even a drizzle of warm chocolate sauce.
- Healthier Option: Homemade ice cream cones can be a healthier alternative to store-bought versions. You can choose quality, natural ingredients, control the amount of sugar, and even add some nutritious toppings like crushed nuts or berries for an extra boost.
- Fun for the Whole Family: Making ice cream cones is a great activity for family and friends. From choosing flavors to stacking the cones with creative toppings, everyone can get involved, making it a memorable experience.
- Quick and Easy: Despite what you might think, making ice cream cones from scratch is a simple and quick process. With just a few basic ingredients, you can whip up a batch in no time, leaving you with a fun, refreshing treat ready to enjoy.
- Perfect for Any Occasion: Whether you’re hosting a summer party, celebrating a special occasion, or just enjoying a relaxing evening at home, ice cream cones are the perfect go-to dessert. They’re easy to serve and always a crowd-pleaser.
So, whether you’re making a quick dessert for the family or impressing guests with a creative twist on a classic, homemade ice cream cones are a must-try treat
Ingredients for Your Ice Cream Cones
Making homemade ice cream cones doesn’t require a long list of ingredients, but having the right ones ensures that your cones are as delicious as they are fun to make. Here’s what you’ll need:
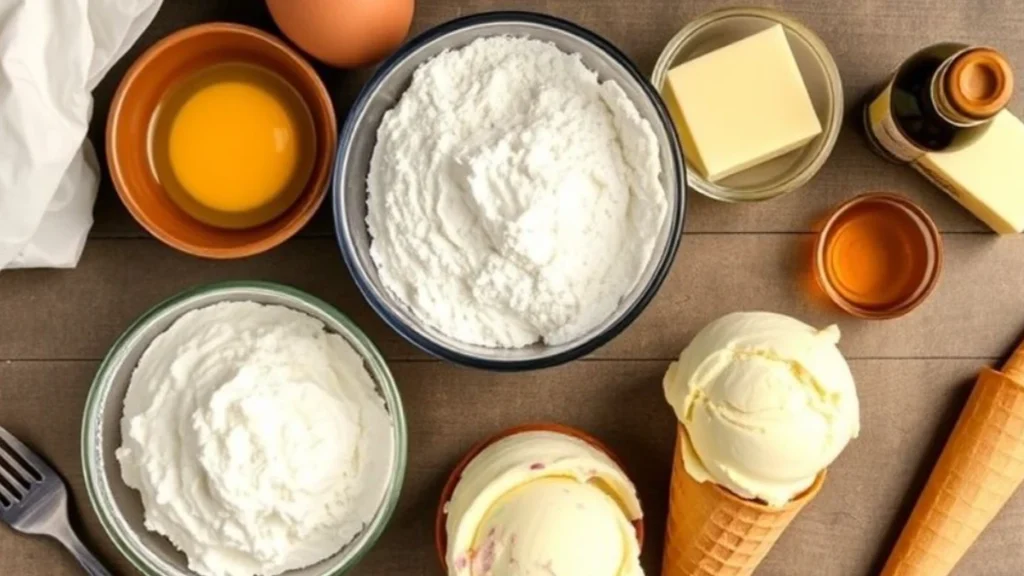
- Ice Cream Cones: You can choose between classic sugar cones, waffle cones, or even a crunchy cone variety, depending on your personal preference. If you’re making the cones from scratch, you’ll need a simple batter (which we’ll cover in the method section).
- Ice Cream: Of course, no cone is complete without ice cream! Choose your favorite flavors—classic vanilla, rich chocolate, or a mix of fruity sorbets. You can even go for non-dairy or low-sugar options to make your cones a bit lighter.
- Toppings: The fun doesn’t stop at the cone itself. Here are some popular options for topping your homemade ice cream:
- Sprinkles: Rainbow or chocolate sprinkles add a fun crunch and pop of color.
- Chopped Nuts: Almonds, peanuts, or pistachios can give your cones a nutty, crunchy texture.
- Fruit: Fresh berries, banana slices, or even small chunks of tropical fruits like pineapple can take your ice cream cones to the next level.
- Chocolate Sauce: A drizzle of melted chocolate or hot fudge adds extra decadence to every bite.
- Caramel or Honey: For a sweet and sticky addition, drizzle on some caramel sauce or honey.
- Optional Ingredients for Homemade Cones: If you’re making the cones from scratch, you’ll need basic pantry ingredients like:
- Flour: All-purpose flour works best for the perfect cone texture.
- Eggs: They help bind the batter and provide structure.
- Butter: Adds richness to the batter and ensures crispiness.
- Sugar: Sweetens the batter, creating that perfect cone crunch.
- Vanilla Extract: Adds a pleasant aromatic flavor that complements the ice cream.
Pro Tip: If you want to take your cones to the next level, consider dipping the top of your cone in melted chocolate before adding your ice cream. Once the chocolate hardens, it forms a delicious, crunchy layer that adds a delightful contrast to the creamy ice cream inside.
With these ingredients, you’re ready to assemble your cones and get creative with flavors and toppings
Method for Making Ice Cream Cones
Now comes the fun part! Here’s a step-by-step guide to creating your very own Simply Irresistible Ice Cream Cones. Whether you’re making the cones from scratch or just assembling them with your favorite store-bought ones, this method is quick and easy.
1. Prepare Your Ice Cream (If Necessary)
If you’re using store-bought ice cream, make sure it’s softened slightly so that it’s easy to scoop. If you’re making your own ice cream, prepare it ahead of time and let it freeze until firm. This way, you won’t have any issues when it’s time to fill your cones.
2. Make the Homemade Cones (Optional)
If you’re feeling adventurous and want to make your own cones, here’s how to do it:
- Preheat your oven to 375°F (190°C). Grease a baking sheet with a bit of butter or line it with parchment paper.
- Mix the Batter: In a bowl, combine your flour, sugar, butter, eggs, and vanilla extract. Mix until smooth.
- Shape the Cones: Spoon the batter onto the baking sheet in small circles, about 4-5 inches in diameter. You can use the back of a spoon to spread the batter into thin, even layers.
- Bake: Bake for about 7-10 minutes, or until the edges turn golden brown.
- Form the Cones: While the cones are still soft and warm, quickly roll them around a cone mold (or a wooden spoon handle) to form a cone shape. Hold them in place until they set and become firm.
3. Assemble the Ice Cream Cones
- Scoop the Ice Cream: Use an ice cream scoop to fill your cone with your favorite ice cream. Press down gently to pack it in and create a nice, smooth top. If you’re feeling extra, stack a second scoop on top for that ice cream shop feel!
- Add Toppings: Here’s where you can get creative. Sprinkle your chosen toppings like sprinkles, nuts, or even drizzle a little melted chocolate over the top.
4. Chill Before Serving
If you’ve got time, pop your cones into the freezer for 10-15 minutes. This will help the ice cream firm up and make sure everything stays together.
Pro Tip: To prevent the ice cream from melting too quickly, you can place the cones in a cup or ice cream cone holder while you prepare the toppings. This will also make it easier to serve!
Now that you’ve mastered the steps, it’s time to enjoy your Simply Irresistible Ice Cream Cones. The perfect combination of crunchy, creamy, and sweet is waiting for you
Pro Tips and Variations
Now that you’ve got the basics down, let’s elevate your Simply Irresistible Ice Cream Cones with some pro tips and fun variations. Whether you’re looking to add a special touch or try something new, these ideas will make your ice cream cones even more exciting and personalized.
Pro Tips for Perfect Ice Cream Cones:
- Soften Your Ice Cream Before Scooping: To make scooping easier, let your ice cream sit out at room temperature for 5–10 minutes before you start. This will help it scoop smoothly without any mess.
- Waffle Cone vs. Sugar Cone: If you’re not sure which to choose, here’s a quick guide:
- Waffle Cones: These have a rich, buttery flavor and a crisp texture, making them a perfect match for creamy ice cream.
- Sugar Cones: These are slightly sweeter and have a more intense crunch, which pairs well with bold-flavored ice creams like chocolate or coffee.
- Keep Cones Upright: While assembling your cones, use a cup or cone holder to keep them upright. This will prevent the ice cream from spilling over while you work.
Flavor and Topping Variations:
- Chocolate-Dipped Cones: After filling your cone, dip the top in melted chocolate. For extra crunch, roll it in crushed nuts, sprinkles, or even crushed cookies. This adds an indulgent layer and extra texture.
- Seasonal Flavors: Depending on the time of year, you can switch up the ice cream flavors to reflect the season. For example, go for pumpkin or cinnamon ice cream in the fall, or fresh fruit sorbets in the summer.
- Add a Layer of Crunch: For a unique twist, fill the bottom of your cone with mini chocolate chips, crushed nuts, or even crumbled cookies before adding the ice cream. This adds a delightful surprise in every bite.
Healthier Variations:
- Lighten Up Your Toppings: If you’re looking for a healthier option, top your cone with fresh fruit like berries, banana slices, or even a drizzle of honey or agave syrup. These natural ingredients provide a touch of sweetness without all the sugar.
- Non-Dairy Options: If you’re vegan or lactose intolerant, substitute your regular ice cream with coconut, almond, or soy-based ice cream. You’ll still get that creamy texture and flavor but with a dairy-free twist!
Fun for Kids and Families:
- DIY Cone Bar: Set up a DIY cone station where everyone can create their custom cones. Offer a variety of ice cream flavors, toppings, and even cone types for a fun and interactive dessert experience.
- Mini Cones for Little Ones: If you’re serving kids, consider using smaller cones or making mini versions of the ice cream scoops. It’s a fun way to control portion sizes and let the little ones enjoy a perfectly sized treat.
These tips and variations are perfect for taking your ice cream cones to the next level. Whether you’re sticking to the classic or experimenting with new flavors and toppings, you’ll be creating a dessert that’s both delicious and fun every time
Serving Suggestions for Your Ice Cream Cones
Now that you’ve crafted the perfect Simply Irresistible Ice Cream Cones, it’s time to serve them up in style! Presentation can make a big difference when it comes to enjoying your homemade treat. Here are some fun and creative serving suggestions that will make your ice cream cones even more irresistible.
1. Serve in Cone Holders or Cups
For a polished, ice cream parlor-style presentation, serve your cones in cone holders or tall cups. This not only keeps them upright but also adds a charming touch to your dessert spread. If you don’t have a cone holder, you can even use a muffin tin to keep them standing!
2. Add a Splash of Color
Brighten up your cones with colorful toppings. Use rainbow sprinkles, edible glitter, or colorful candy pieces to add a festive touch. This is especially fun for kids’ parties or summer gatherings, where vibrant colors always make everything more exciting!
3. Pair with a Cold Beverage
For a refreshing pairing, serve your cones with a chilled beverage like homemade iced tea, lemonade, or sparkling water. The cool drink complements the creamy ice cream and provides a refreshing contrast to the sweetness of your dessert.
4. Create a Dessert Platter
For a fun twist, create a mini ice cream cone platter with a variety of cones. Offer different ice cream flavors and toppings, letting guests or family members build their perfect cone. It’s a great way to offer variety and allow everyone to get creative with their choices.
5. Add a Sweet Serving Tray
To make your ice cream cones feel extra special, serve them on a stylish tray. Use a vintage-looking wooden board or a fun, themed tray to create an appealing visual effect. Add some decorative touches like small fruit garnishes or even a sprig of mint to elevate the look.
6. Perfect for Sharing
Ice cream cones are perfect for sharing. If you’re serving a crowd, consider cutting your cones in half and serving them alongside other desserts, like brownies or cookies. A mini cone “flight” with a variety of flavors allows everyone to taste a little of everything.
Pro Tip: If you’re hosting a party, make a cute ice cream cone station where guests can build their cones with different ice cream, toppings, and sauces. This DIY dessert bar is sure to be a hit!
With these serving ideas, you’re sure to impress your guests or simply elevate your own ice cream experience. Whether you’re keeping it simple or going all out with a full dessert spread, these cones will be the star of the show
Conclusion: Why You’ll Love These Ice Cream Cones
There’s something truly magical about the combination of creamy, cold ice cream nestled in a crispy cone—whether you’re enjoying it on a sunny day or celebrating a special occasion. These Simply Irresistible Ice Cream Cones are not only quick and easy to make but also endlessly customizable to fit your tastes and preferences. With endless flavor combinations, toppings, and variations, this recipe ensures that every cone you create is a personal masterpiece.
By making your own cones, you have full control over the quality and ingredients, ensuring a fresh, homemade treat that’s perfect for any occasion. Whether you’re serving them at a party, creating a fun family activity, or simply indulging in a solo treat, homemade ice cream cones elevate the classic dessert into something truly special.
So, gather your ingredients, get creative with your toppings, and enjoy the delightful crunch and creamy goodness of these irresistible cones. You deserve a treat that’s as sweet as this!
Don’t forget to share your creations—whether it’s a classic cone or a daring new flavor combination. These ice cream cones are sure to become a go-to recipe for every sweet tooth in your home
Ice Cream Cones
Ingredients
Ingredients for Your Ice Cream Cones
- Making homemade ice cream cones doesn’t require a long list of ingredients but having the right ones ensures that your cones are as delicious as they are fun to make. Here’s what you’ll need:
- Ice Cream Cones: You can choose between classic sugar cones waffle cones, or even a crunchy cone variety, depending on your personal preference. If you’re making the cones from scratch, you’ll need a simple batter (which we’ll cover in the method section).
- Ice Cream: Of course no cone is complete without ice cream! Choose your favorite flavors—classic vanilla, rich chocolate, or a mix of fruity sorbets. You can even go for non-dairy or low-sugar options to make your cones a bit lighter.
- Toppings: The fun doesn’t stop at the cone itself. Here are some popular options for topping your homemade ice cream:
- Sprinkles: Rainbow or chocolate sprinkles add a fun crunch and pop of color.
- Chopped Nuts: Almonds peanuts, or pistachios can give your cones a nutty, crunchy texture.
- Fruit: Fresh berries banana slices, or even small chunks of tropical fruits like pineapple can take your ice cream cones to the next level.
- Chocolate Sauce: A drizzle of melted chocolate or hot fudge adds extra decadence to every bite.
- Caramel or Honey: For a sweet and sticky addition drizzle on some caramel sauce or honey.
- Optional Ingredients for Homemade Cones: If you’re making the cones from scratch you’ll need basic pantry ingredients like:
- Flour: All-purpose flour works best for the perfect cone texture.
- Eggs: They help bind the batter and provide structure.
- Butter: Adds richness to the batter and ensures crispiness.
- Sugar: Sweetens the batter creating that perfect cone crunch.
- Vanilla Extract: Adds a pleasant aromatic flavor that complements the ice cream.
Pro Tip: If you want to take your cones to the next level, consider dipping the top of your cone in melted chocolate before adding your ice cream. Once the chocolate hardens, it forms a delicious, crunchy layer that adds a delightful contrast to the creamy ice cream inside.
Instructions
Method for Making Ice Cream Cones
- Now comes the fun part! Here’s a step-by-step guide to creating your very own Simply Irresistible Ice Cream Cones. Whether you’re making the cones from scratch or just assembling them with your favorite store-bought ones, this method is quick and easy.
Prepare Your Ice Cream (If Necessary)
- If you’re using store-bought ice cream, make sure it’s softened slightly so that it’s easy to scoop. If you’re making your own ice cream, prepare it ahead of time and let it freeze until firm. This way, you won’t have any issues when it’s time to fill your cones.
Make the Homemade Cones (Optional)
- If you’re feeling adventurous and want to make your own cones, here’s how to do it:
- Preheat your oven to 375°F (190°C). Grease a baking sheet with a bit of butter or line it with parchment paper.
- Mix the Batter: In a bowl, combine your flour, sugar, butter, eggs, and vanilla extract. Mix until smooth.
- Shape the Cones: Spoon the batter onto the baking sheet in small circles, about 4-5 inches in diameter. You can use the back of a spoon to spread the batter into thin, even layers.
- Bake: Bake for about 7-10 minutes, or until the edges turn golden brown.
- Form the Cones: While the cones are still soft and warm, quickly roll them around a cone mold (or a wooden spoon handle) to form a cone shape. Hold them in place until they set and become firm.
Assemble the Ice Cream Cones
- Scoop the Ice Cream: Use an ice cream scoop to fill your cone with your favorite ice cream. Press down gently to pack it in and create a nice, smooth top. If you’re feeling extra, stack a second scoop on top for that ice cream shop feel!
- Add Toppings: Here’s where you can get creative. Sprinkle your chosen toppings like sprinkles, nuts, or even drizzle a little melted chocolate over the top.
Chill Before Serving
- If you’ve got time, pop your cones into the freezer for 10-15 minutes. This will help the ice cream firm up and make sure everything stays together.
Pro Tip: To prevent the ice cream from melting too quickly, you can place the cones in a cup or ice cream cone holder while you prepare the toppings. This will also make it easier to serve!
Notes
- Calories: 280
- Fat: 15g
- Saturated Fat: 7g
- Cholesterol: 30mg
- Sodium: 45mg
- Carbohydrates: 34g
- Fiber: 2g
- Sugar: 22g
- Protein: 3g
FAQs About Homemade Ice Cream Cones
Got questions? We’ve got answers! Here are some of the most frequently asked questions about making Simply Irresistible Ice Cream Cones that will help you along the way:
1. Can I use store-bought cones instead of making them from scratch?
Absolutely! While making your own cones from scratch adds a personal touch, store-bought cones are a convenient and perfectly fine option. You can still enjoy the same great flavors and toppings without the extra step of baking. Just focus on creating delicious ice cream and toppings for an easy, satisfying dessert!
2. How do I prevent the ice cream from melting too quickly in the cone?
To keep your cones from melting too fast, try these tips:
- Chill your cones: If you’ve made your own cones, store them in the freezer for a few minutes before filling them with ice cream. This helps the cones stay crisp and cool for longer.
- Serve immediately: Once assembled, serve the cones right away to avoid the ice cream from softening too much.
- Use firmer ice cream: Let your ice cream firm up in the freezer before scooping. Softer ice cream tends to melt faster, so a slightly harder consistency will help it stay in place.
3. Can I make these ice cream cones ahead of time?
Yes, you can! If you’re preparing for a party or get-together, assemble your cones and store them in the freezer for up to 30 minutes before serving. Just be sure to avoid adding toppings like sprinkles or whipped cream ahead of time, as they might lose their crunch or freshness.
4. What are some fun variations I can try with the cone?
There are plenty of ways to make your cones even more exciting:
- Dipped Cones: After filling your cone, dip the top in melted chocolate or caramel, then roll it in crushed cookies, nuts, or sprinkles for a decadent finish.
- Mini Cones: If you’re hosting a party or event, try serving mini cones for a fun, bite-sized treat.
- Waffle Cone Crust: Crumble up waffle cones and use them as a crunchy topping for your ice cream, or even line the bottom of the cone for added texture.
5. Can I use non-dairy ice cream for this recipe?
Definitely! Non-dairy ice cream made from coconut milk, almond milk, or oat milk works just as well. It’s a great option for vegan or lactose-intolerant diets. You’ll still get that creamy texture and delightful flavors, minus the dairy.
6. How do I store leftover cones or ice cream?
If you have leftover cones, store them in an airtight container to keep them fresh. You can also freeze your leftover ice cream to enjoy it later—just make sure to store it in a well-sealed container to prevent freezer burn.
With these tips in hand, you’re ready to confidently create your perfect homemade ice cream cones! Whether you’re making them for yourself or sharing them with friends and family, these cones are sure to be a hit. Enjoy
Have you ever tried this recipe?
There are no reviews yet. Be the first one to write one.