
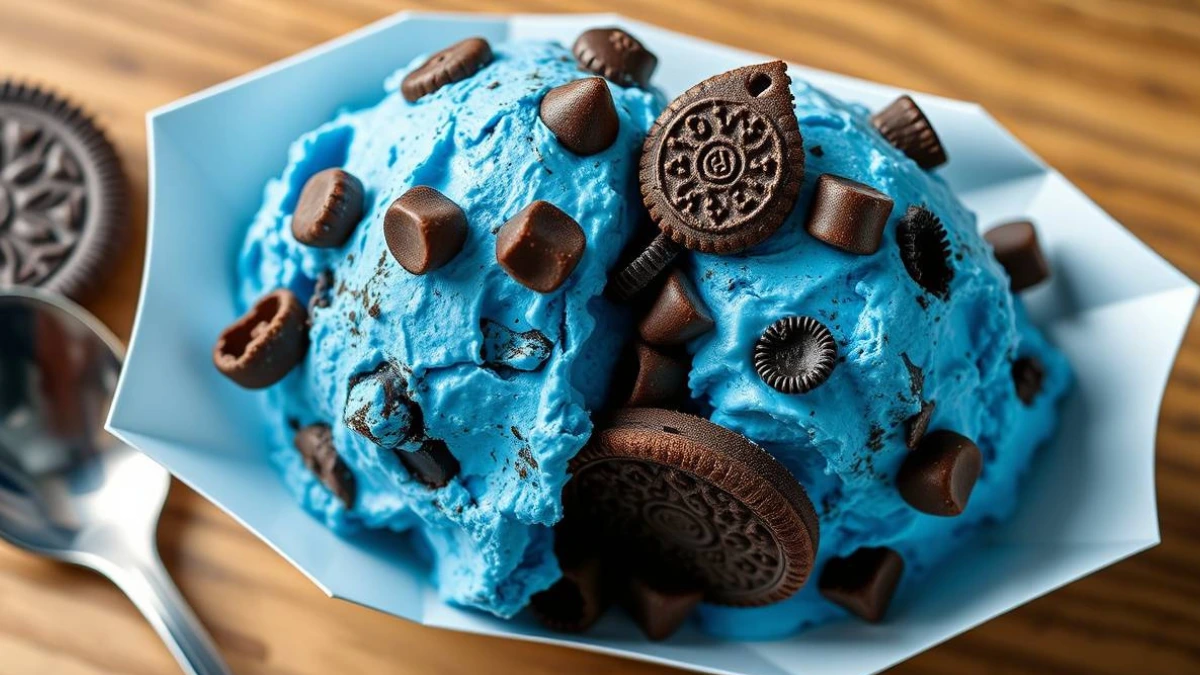
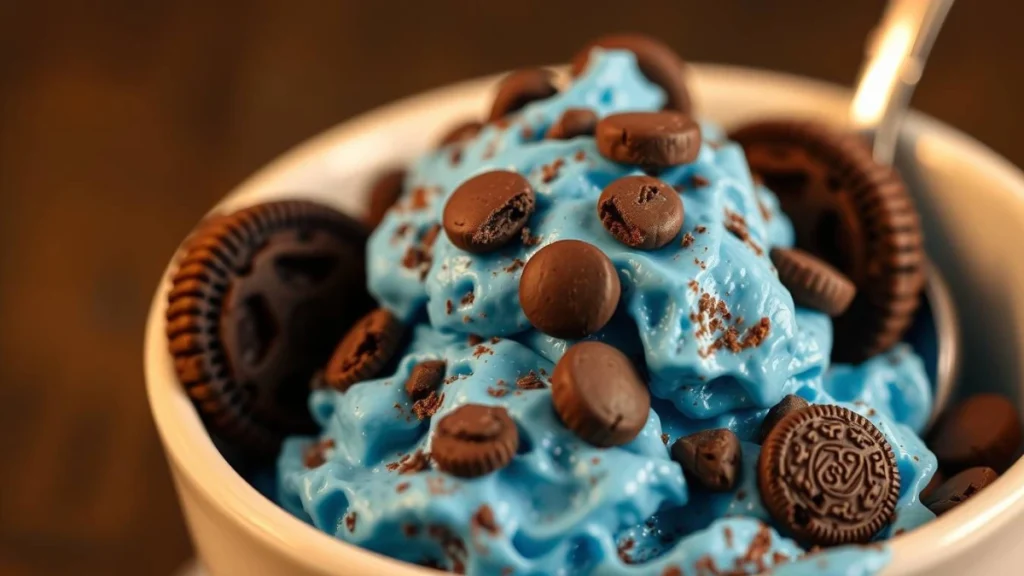
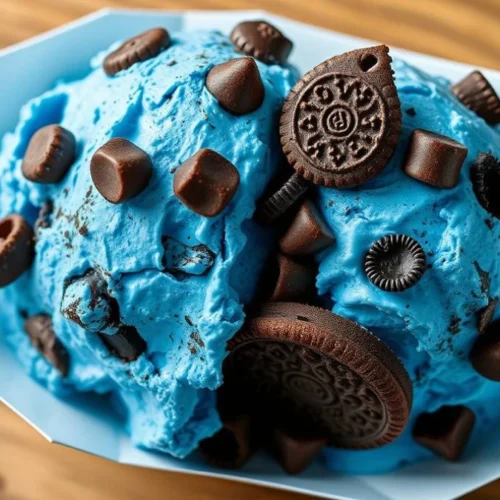
Have you ever craved a dessert that’s as fun to make as it is to eat? This Cookie Monster ice cream is a simply addictive treat that brings joy to kids and nostalgia to adults—all in one colorful scoop. With its bright blue hue, chewy cookie chunks, and creamy no-churn base, it’s the ultimate easy frozen treat for birthdays, summer afternoons, or just because.
What I love most about this recipe is how effortlessly it comes together—no ice cream maker needed, just a few pantry staples and a playful spirit. Whether you’re making it for a party or sharing it as a midweek surprise, this homemade ice cream delivers big smiles with every bite.
Let’s dive in and whip up a dessert that’s as bold and joyful as Cookie Monster himself.
Table of Contents
Key Benefits
This Cookie Monster Ice Cream isn’t just another dessert—it’s a game-changer! If you’re looking for something that’s as easy to make as it is delicious, this recipe is exactly what you need. Let’s break down why this homemade treat is a must-try:
- No Churn, No Fuss: The beauty of this recipe lies in its simplicity. No need for fancy equipment like ice cream makers—just a few ingredients, a little time, and you’re all set. Perfect for anyone who wants homemade ice cream without the hassle of churning.
- Customizable to Your Taste: While the vibrant blue color and cookie chunks are iconic, you can easily tailor this recipe to suit your cravings. Add your favorite cookies, change up the flavor, or even try different mix-ins like chocolate chips, candy pieces, or even crushed pretzels for a salty-sweet twist.
- Ultra-Creamy Texture: Thanks to the combination of heavy cream and sweetened condensed milk, this ice cream has a luxuriously creamy texture that’s hard to beat. It’s rich without being overly heavy, making every scoop indulgent yet smooth.
- Fun for the Whole Family: Whether you’re serving this at a birthday party, a family gathering, or just a casual weeknight treat, it’s sure to impress both kids and adults. The fun blue color and crunchy cookie pieces make this ice cream as exciting to eat as it is to make.
- Quick Prep Time: This recipe is as efficient as it is delicious. With just a little prep time, you’ll have your ice cream ready to freeze. No need for hours of work—just simple, straightforward steps that yield fantastic results.
With all these benefits, you can’t go wrong with this Cookie Monster Ice Cream. It’s the perfect balance of creamy, crunchy, and totally customizable. Ready to dive into the recipe? Let’s get started!
Ingredients
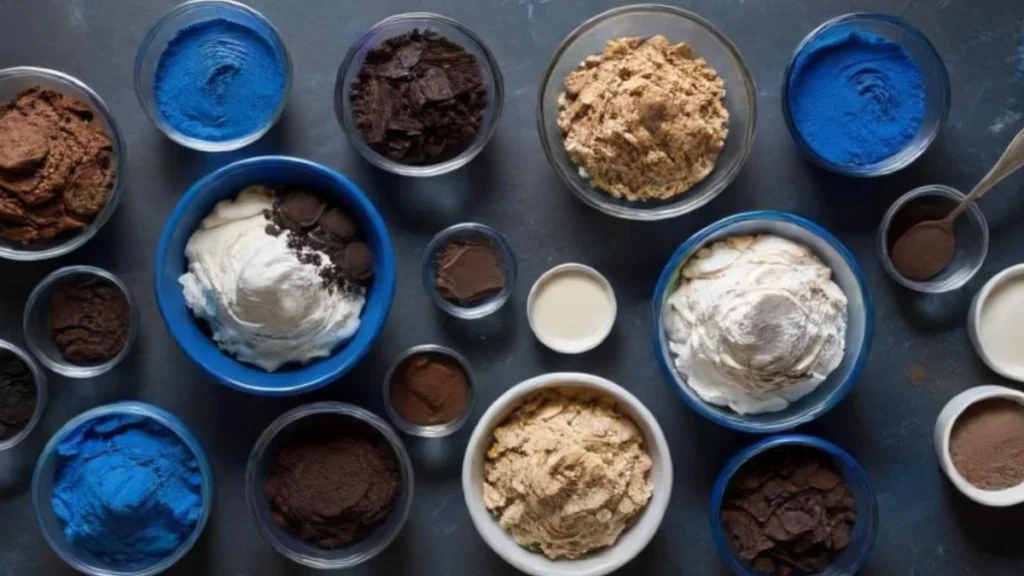
Now that you’re excited to make your own batch of Cookie Monster Ice Cream, let’s talk about the simple ingredients you’ll need to bring this indulgent treat to life. Don’t worry—no complicated or hard-to-find items here! This recipe uses pantry staples and a few key components to create the ultimate creamy dessert.
What You’ll Need:
- 2 cups heavy cream – This gives the ice cream its smooth, velvety texture. Don’t skip this one!
- 1 can (14 oz) sweetened condensed milk – Adds the perfect amount of sweetness and helps achieve that rich, creamy consistency without needing to churn.
- 1 tsp vanilla extract – Enhances the flavor and complements the sweetness.
- 1 cup crushed cookies (like chocolate chip or Oreos) – The crunchy chunks are the star of the show, adding texture and flavor.
- Blue food coloring (optional) – For that fun, Cookie Monster-inspired look! You can add more or less depending on how bold you want the color.
- Pinch of salt – A tiny bit of salt helps balance the sweetness and brings out the flavors even more.
Tips:
- Choose your cookies wisely: While chocolate chip cookies are a classic choice, you can experiment with other cookies like Oreos, or even go for a mix of both! The more texture, the better.
- Customize the color: You don’t have to use blue food coloring. Feel free to get creative with other fun colors that suit your theme or mood.
- Dairy-Free? If you’re looking for a dairy-free option, you can easily swap the heavy cream with coconut cream and the sweetened condensed milk with a plant-based alternative.
Pro Tip:
- Don’t overmix: When adding the crushed cookies, gently fold them into the ice cream base. This ensures you get those perfect cookie chunks throughout the ice cream, rather than having them turn into crumbs.
With these ingredients, you’re all set to create a delicious and fun dessert that’s sure to wow everyone. Ready to mix everything together? Let’s move on to the next step!
Method
Now comes the fun part—making your Cookie Monster Ice Cream! This is where the magic happens, and don’t worry, it’s as easy as mixing and freezing. Let’s walk through the steps together.
Step-by-Step Instructions:
- Whip the Cream
In a large mixing bowl, use a hand mixer or stand mixer to beat the heavy cream on medium-high speed until stiff peaks form. This usually takes about 3-5 minutes. Don’t rush this step—it’s crucial for getting that creamy texture! - Combine the Condensed Milk and Vanilla
In a separate bowl, pour the sweetened condensed milk and add the vanilla extract. Stir until fully combined. This is your sweet base, and it’s going to add that irresistible creaminess. - Fold the Mixture Together
Gently fold the whipped cream into the condensed milk mixture. Be careful not to deflate the cream—use a spatula to fold it in slowly. This will give the ice cream its light, airy texture while keeping it rich. - Add the Fun!
This is where you can get creative! Add the crushed cookies into the mixture. Fold them in gently, ensuring they’re evenly distributed throughout. Don’t worry if they break into smaller pieces—this just adds more texture and flavor to each scoop. - Color It (Optional)
If you’re adding blue food coloring for that classic Cookie Monster look, add a few drops at a time, mixing gently until you reach your desired shade. It’s totally up to you how vibrant you want it, so have fun with this step! - Freeze and Wait
Once everything is mixed, transfer your ice cream mixture into a freezer-safe container. Smooth the top with a spatula, then cover tightly with plastic wrap or a lid. Freeze for at least 6 hours, or until it’s fully set. The waiting game is the hardest part, but trust me, it’s worth it!
Tips for Perfect Ice Cream:
- Don’t skip the whipping step: The whipped cream is key for achieving that rich and creamy texture. If you don’t whip it enough, your ice cream may turn out too dense.
- Freeze for longer: For the best results, try to freeze your ice cream overnight. The longer it sits, the more time the flavors have to meld, making each scoop even better.
- Consistency Check: If you want a softer consistency (like soft-serve), you can take it out of the freezer about 10 minutes before serving. For a firmer texture, leave it frozen until ready to enjoy.
This method is simple, straightforward, and will have you enjoying homemade ice cream in no time! The hardest part is the waiting, but trust me, once it’s ready, every scoop will be worth it.
Pro Tips and Variations
Now that you’ve got your Cookie Monster Ice Cream ready to go, let’s talk about ways to elevate this recipe and make it even more irresistible. Whether you want to tweak the flavors or add extra touches, these pro tips and variations will take your ice cream to the next level.
Pro Tips:
- Perfect the Texture: For the creamiest ice cream, make sure to whip the cream until stiff peaks form, but don’t overwhip it. You want the whipped cream to hold its structure without turning into butter. This ensures your ice cream has that light, airy texture.
- Add Extra Mix-Ins: While crushed cookies are a must, feel free to get creative with additional mix-ins. Chocolate chips, crushed pretzels, or even candy pieces like M&Ms can add extra layers of flavor and texture. Just be sure to fold them in gently so they don’t break up too much.
- Chill Your Mixing Bowl: For an even fluffier ice cream base, try chilling your mixing bowl and beaters before whipping the cream. The colder your tools, the better the whipped cream will turn out.
- Swirl It Up: Want to make your ice cream even more fun? After mixing in the cookies, drizzle some chocolate syrup or caramel sauce into the ice cream and swirl it through for an extra burst of flavor. The gooey ribbons of syrup make each scoop even more exciting.
Fun Variations:
- Cookies and Cream Twist: If you love the classic cookies and cream combo, switch out some of the cookies for Oreos or even chocolate wafer cookies. The crunchy, chocolatey bits will add a satisfying contrast to the smooth, creamy base.
- Peanut Butter Lovers: Add a swirl of creamy peanut butter to the mix for a salty-sweet twist. Simply warm up the peanut butter slightly and swirl it through the ice cream mixture before freezing. The combination of chocolate and peanut butter is always a winning flavor combo!
- Colorful Cookie Monster: Want to make it even more fun? Mix in rainbow-colored sprinkles along with the cookies for a playful, party-ready ice cream. This works especially well for birthdays or themed events.
- Dairy-Free Version: For a dairy-free version, use coconut cream or almond milk as a substitute for the heavy cream. Swap out the sweetened condensed milk for a dairy-free alternative, and you’ll still get a creamy, dreamy ice cream without the dairy.
- Chocolate Chip Cookie Version: Want a more classic flavor? Swap out the cookie base for chocolate chip cookies instead of the crushed mix-ins. It’s a subtle twist on the original, but just as fun and tasty.
Tip for Storing:
- Freeze in Small Portions: If you’re planning to store this ice cream for later, consider freezing it in smaller containers. This will help it freeze more evenly and prevent it from getting too hard to scoop after long storage.
These pro tips and variations make this Cookie Monster Ice Cream a super flexible recipe that you can adapt to your personal tastes. Whether you’re looking for something classic, creative, or even dietary-specific, this recipe can be transformed to fit your needs. The possibilities are endless, so feel free to experiment and enjoy!
Serving Suggestions
Now that your Cookie Monster Ice Cream is ready, it’s time to think about how to serve it in the most fun and creative way! This dessert is not just about the flavor—it’s about the experience. Whether you’re enjoying it with friends, serving it at a party, or just indulging on your own, these serving suggestions will make your ice cream experience even more exciting.
Classic Scoops in Bowls or Cones
- The easiest way to enjoy this treat is by serving it in classic ice cream bowls or cones. The vibrant blue color and chunky cookie bits will make each scoop irresistible. Don’t forget to sprinkle a little extra crushed cookie on top for added texture and flavor.
Ice Cream Sundaes
- Turn your Cookie Monster Ice Cream into an over-the-top sundae! Layer it with your favorite toppings like chocolate syrup, whipped cream, sprinkles, and maybe even some marshmallows. The more toppings, the more fun—and it makes for an eye-catching dessert perfect for sharing.
Ice Cream Sandwiches
- For a fun twist, make ice cream sandwiches by placing a generous scoop of ice cream between two cookies (think chocolate chip or Oreos). This handheld version is perfect for parties, picnics, or just a fun treat to enjoy on the go.
Mini Dessert Cups or Jars
- Want to make individual portions more adorable? Serve the ice cream in mini mason jars or small dessert cups. This not only adds a cute factor to your dessert presentation but also makes it easy to portion out the ice cream for a personal touch.
Pair with Fresh Fruit
- Looking to balance the richness of the ice cream? Pair it with some fresh fruit like strawberries, banana slices, or even a handful of blueberries. The freshness of the fruit pairs wonderfully with the sweet, creamy ice cream, adding a refreshing contrast that’ll keep you coming back for more.
Serving Tip:
- Scoop with Warmed Spoons: If the ice cream is a bit too hard to scoop right out of the freezer, run your ice cream scooper under warm water before scooping. This trick makes for perfectly rounded scoops without the struggle.
No matter how you decide to serve it, this Cookie Monster Ice Cream is guaranteed to be the star of the show. Whether you’re building a sundae masterpiece or keeping it simple with a scoop, the result will be just as fun and delicious.
Conclusion
Congratulations! You’ve just created the ultimate Cookie Monster Ice Cream, and it’s time to sit back, relax, and enjoy your delicious masterpiece. This simple yet indulgent recipe is not only fun to make but also an absolute crowd-pleaser. Whether you’re celebrating a special occasion, hosting a party, or simply treating yourself, this dessert is sure to make any moment sweeter.
Why You’ll Love This Recipe:
- Quick and No-Churn: This easy, no-churn ice cream means you don’t need any special equipment like an ice cream maker. A few simple ingredients and some waiting time in the freezer, and you have a creamy, indulgent treat.
- Customizable: Feel free to play around with different mix-ins. If you’re not a fan of cookies, try adding chocolate chunks, candy pieces, or even a swirl of peanut butter for an exciting twist.
- Perfect for All Ages: This colorful, cookie-filled treat is a hit with both kids and adults. It’s the perfect way to make dessert fun for the whole family!
Whether you’re scooping it into bowls, piling it on top of a brownie, or making adorable ice cream sandwiches, the possibilities are endless with Cookie Monster Ice Cream. And don’t forget—this recipe is so versatile that you can create your own personal touch with various toppings and mix-ins.
So, next time you’re craving a sweet treat, skip the store-bought ice cream and make this easy, homemade version. You’ll be amazed at how delicious, creamy, and satisfying this dessert is. Enjoy every scoop and share the love with your friends and family—you’ve earned it!
FAQs
When it comes to making Cookie Monster Ice Cream, there are always a few common questions that pop up. To help you make the most of this fun recipe, here are some answers to the most frequently asked questions!
1. Can I use a different type of cookie in the recipe?
Absolutely! While the classic chocolate chip cookies work perfectly, you can easily swap them out for any cookie of your choice. Oreos, peanut butter cookies, or even sugar cookies will all add their own twist to the ice cream. Just make sure to chop them up into smaller pieces so they mix well into the base.
2. How long does the ice cream take to freeze?
For the best results, let your Cookie Monster Ice Cream freeze for at least 4 hours, but overnight is ideal. This gives the ice cream time to fully set, ensuring a smooth and creamy texture. If you’re in a rush, 4 hours will still give you a delicious result, though it might be a bit softer.
3. Can I make this ice cream dairy-free or vegan?
Yes, you can! For a dairy-free or vegan version, simply swap the heavy cream and sweetened condensed milk for alternatives like coconut milk and coconut cream. You’ll still get that creamy, rich texture, but with a completely plant-based twist. Be sure to check the ingredients of your cookies, too, to make sure they’re dairy-free!
4. Can I add other mix-ins to this ice cream?
Of course! This recipe is very customizable. Add-ins like chocolate chunks, marshmallows, or even peanut butter cups will add more texture and flavor to the ice cream. Just be sure not to overdo it—keep the balance of flavors in mind so that the base remains the star of the show.
These tips and answers should help you enjoy your Cookie Monster Ice Cream to the fullest. Don’t hesitate to get creative and personalize this recipe even more—it’s a fun and delicious treat that’s easy to adapt to your tastes! Enjoy, and happy scooping!
Cookie Monster Ice Cream Recipe
Ingredients
Ingredients
- Now that you’re excited to make your own batch of Cookie Monster Ice Cream let’s talk about the simple ingredients you’ll need to bring this indulgent treat to life. Don’t worry—no complicated or hard-to-find items here! This recipe uses pantry staples and a few key components to create the ultimate creamy dessert.
What You’ll Need:
- 2 cups heavy cream – This gives the ice cream its smooth velvety texture. Don’t skip this one!
- 1 can 14 oz sweetened condensed milk – Adds the perfect amount of sweetness and helps achieve that rich, creamy consistency without needing to churn.
- 1 tsp vanilla extract – Enhances the flavor and complements the sweetness.
- 1 cup crushed cookies like chocolate chip or Oreos – The crunchy chunks are the star of the show, adding texture and flavor.
- Blue food coloring optional – For that fun, Cookie Monster-inspired look! You can add more or less depending on how bold you want the color.
- Pinch of salt – A tiny bit of salt helps balance the sweetness and brings out the flavors even more.
Tips:
- Choose your cookies wisely: While chocolate chip cookies are a classic choice you can experiment with other cookies like Oreos, or even go for a mix of both! The more texture, the better.
- Customize the color: You don’t have to use blue food coloring. Feel free to get creative with other fun colors that suit your theme or mood.
- Dairy-Free? If you’re looking for a dairy-free option you can easily swap the heavy cream with coconut cream and the sweetened condensed milk with a plant-based alternative.
Pro Tip:
- Don’t overmix: When adding the crushed cookies gently fold them into the ice cream base. This ensures you get those perfect cookie chunks throughout the ice cream, rather than having them turn into crumbs.
- With these ingredients you’re all set to create a delicious and fun dessert that’s sure to wow everyone. Ready to mix everything together? Let’s move on to the next step!
Instructions
Method
- Now comes the fun part—making your Cookie Monster Ice Cream! This is where the magic happens, and don’t worry, it’s as easy as mixing and freezing. Let’s walk through the steps together.
Step-by-Step Instructions:
Whip the Cream
- In a large mixing bowl, use a hand mixer or stand mixer to beat the heavy cream on medium-high speed until stiff peaks form. This usually takes about 3-5 minutes. Don’t rush this step—it’s crucial for getting that creamy texture!
Combine the Condensed Milk and Vanilla
- In a separate bowl, pour the sweetened condensed milk and add the vanilla extract. Stir until fully combined. This is your sweet base, and it’s going to add that irresistible creaminess.
Fold the Mixture Together
- Gently fold the whipped cream into the condensed milk mixture. Be careful not to deflate the cream—use a spatula to fold it in slowly. This will give the ice cream its light, airy texture while keeping it rich.
Add the Fun!
- This is where you can get creative! Add the crushed cookies into the mixture. Fold them in gently, ensuring they’re evenly distributed throughout. Don’t worry if they break into smaller pieces—this just adds more texture and flavor to each scoop.
Color It (Optional)
- If you’re adding blue food coloring for that classic Cookie Monster look, add a few drops at a time, mixing gently until you reach your desired shade. It’s totally up to you how vibrant you want it, so have fun with this step!
Freeze and Wait
- Once everything is mixed, transfer your ice cream mixture into a freezer-safe container. Smooth the top with a spatula, then cover tightly with plastic wrap or a lid. Freeze for at least 6 hours, or until it’s fully set. The waiting game is the hardest part, but trust me, it’s worth it!
Notes
- Calories: 375
-
Fat: 22g
- Saturated Fat: 12g
-
Carbohydrates: 42g
- Sugars: 35g
- Protein: 4g
- Fiber: 1g
- Sodium: 120mg
- Cholesterol: 65mg
Have you ever tried this recipe?
There are no reviews yet. Be the first one to write one.