
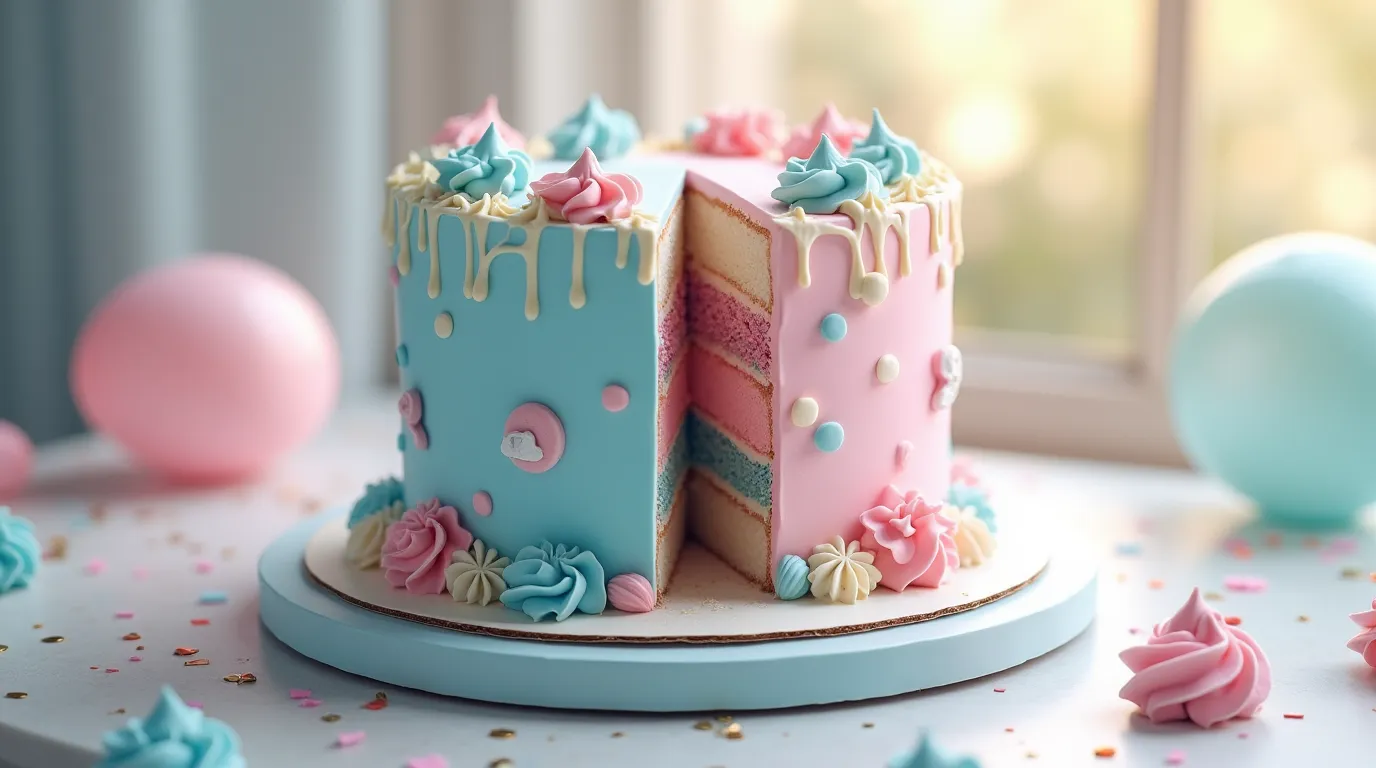
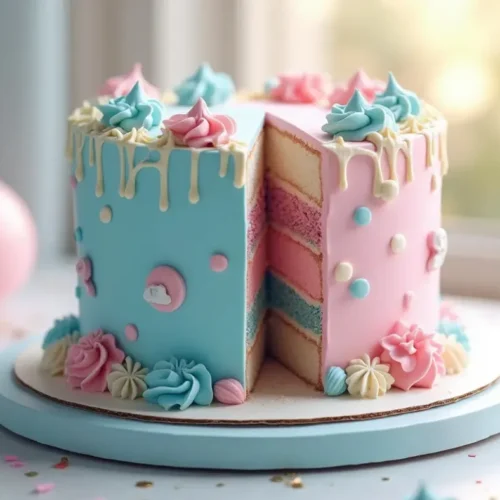
Are you ready to make your gender reveal party truly unforgettable? A gender reveal cake is more than just a dessert—it’s a centerpiece of excitement and joy that brings family and friends together for a magical moment. Imagine slicing into a beautifully decorated cake to reveal a pop of pink or blue, creating memories you’ll cherish forever.
Whether you’re hosting an intimate gathering or a grand celebration, this cake offers endless customization options to match your theme and style. With simple ingredients and a touch of creativity, you can craft a stunning surprise that will leave everyone in awe. Let’s dive into the recipe and make your big moment even sweeter!
Table of Contents
1. Key Benefits of Making a Gender Reveal Cake
A gender reveal cake is more than just a fun treat—it’s a way to make a moment unforgettable. Here are some reasons why this cake is the perfect addition to your celebration:
- Excitement and Surprise: There’s nothing quite like the moment when you cut into the cake and reveal the gender of your baby. It’s a visual surprise that brings instant joy to everyone in the room, making the entire party feel extra special.
- Customizable Designs: Whether you want a classic pink or blue cake or something more unique, like rainbow layers or metallic accents, a gender reveal cake offers endless design possibilities. You can match the cake to your party’s theme, making it both delicious and visually striking.
- Create Lasting Memories: Cakes are often the centerpiece of celebrations, and a gender reveal cake becomes a keepsake moment. The photos of family and friends reacting to the reveal will be memories you treasure for years to come.
- Easy to Personalize: This cake is a great canvas for creativity. From edible glitter to sprinkles, food coloring, and even personalized toppers, you can easily add your personal touch. This ensures your cake isn’t just tasty, but truly reflects the excitement and joy of your big reveal.
- Perfect for Any Size Party: Whether you’re hosting a small family gathering or a larger event, a gender reveal cake fits perfectly into any size celebration. You can adjust the size, flavors, and decorations to suit your guest list, ensuring everyone gets a piece of the excitement.
Making a gender reveal cake is not just about baking; it’s about creating an experience. With each slice, you’re not only sharing a cake but also a moment of pure happiness with everyone who’s there to celebrate. Ready to dive into the next part of your cake-making journey? Let’s get to the ingredients!
2. Ingredients for Your Gender Reveal Cake
To make this gender reveal cake as amazing as it sounds, let’s gather the ingredients. Don’t worry, it’s all straightforward, and I’ll walk you through each step. From the light and fluffy cake layers to the rich frosting, everything works together to create the perfect reveal. Here’s what you’ll need:

Cake Layers:
- 2 ½ cups all-purpose flour – This will form the base of your cake, giving it that soft, fluffy texture everyone loves.
- 2 ½ teaspoons baking powder – Essential to make sure the cake rises properly and stays light.
- ½ teaspoon salt – A little salt to balance the sweetness.
- 1 cup unsalted butter, softened – This is key to creating a moist, tender cake.
- 2 cups granulated sugar – To sweeten the cake and help it rise beautifully.
- 4 large eggs – These bind everything together and help the cake structure.
- 1 teaspoon vanilla extract – Adds a warm, sweet flavor to enhance the overall taste.
- 1 cup whole milk – This adds moisture to the cake layers for an irresistible soft texture.
- Blue or pink food coloring – The star of the show! Choose either color to surprise everyone with the gender reveal inside the cake. Gel food coloring works best for a vibrant pop.
Frosting:
- 1 cup unsalted butter, softened – The creamy base for the perfect frosting.
- 4 cups powdered sugar – Gives the frosting its fluffy, sweet texture and stability.
- 2 teaspoons vanilla extract – Adds a rich flavor to balance the sweetness.
- 2-4 tablespoons heavy cream – Adjust for the ideal frosting consistency—smooth and easy to spread!
- Pinch of salt – Just a touch to balance the sweetness of the frosting.
Surprise Filling:
- Candy, sprinkles, or colored sugar (blue or pink) – The best part! When you cut into the cake, the filling will reveal the gender surprise. You can also use confetti for a fun twist.
Optional Decorations:
- Edible glitter or metallic sprinkles – Add a little sparkle to your cake for a festive look.
- Fresh flowers or personalized toppers – Give your cake a unique touch that will wow your guests.
With all these ingredients lined up, you’re ready to bring this delicious creation to life! Just remember, every step counts in making this a showstopper, so take your time and enjoy the process. Now, let’s dive into the next section: How to make this cake magic happen!
3. How to Make Your Gender Reveal Cake
Creating your gender reveal cake is an exciting journey, and I’m here to guide you through each step! With a mix of creativity, a little patience, and these easy-to-follow instructions, you’ll be baking a memorable and stunning cake in no time. Let’s dive in!

Step 1: Prepare Your Cake Pans
Start by preparing two 8-inch round cake pans. Lightly grease them with butter or cooking spray, then dust them with flour, or line the bottom with parchment paper. This ensures your cake layers won’t stick, making them easier to remove and frost. Properly greased pans will help you achieve smooth, beautiful layers.
Step 2: Mix the Cake Batter
In a medium bowl, whisk together your flour, baking powder, and salt. This step helps evenly distribute the dry ingredients, ensuring a light and fluffy cake texture.
In a large mixing bowl, beat butter and sugar until the mixture is light and fluffy. This should take about 3 minutes. Add the eggs, one at a time, and continue beating to incorporate them fully. Don’t forget the vanilla extract for that extra burst of flavor. Once your wet ingredients are combined, it’s time to add the dry ingredients and the milk.
Alternate adding the dry ingredients and the milk to the butter mixture, beginning with the dry ingredients. Mix just until combined—overmixing could make your cake dense.
Step 3: Add the Color
Now, divide the batter evenly into two bowls. Add a few drops of blue or pink food coloring to one of the bowls, depending on whether you’re revealing a boy or a girl. Stir gently to ensure the color is evenly mixed. This adds a fun surprise element and sets the tone for your reveal!
Step 4: Bake Your Cake Layers
Pour the colored batter into your prepared pans, alternating between the pink and blue batter if you wish to create a marbled effect, or simply pour them in separately. Tap the pans gently on the counter to remove any air bubbles.
Bake your cakes at 350°F (175°C) for about 25-30 minutes. You can check for doneness by inserting a toothpick into the center—if it comes out clean, your cakes are ready.
Allow your cakes to cool in the pans for about 10 minutes, then transfer them to a wire rack to cool completely before frosting. Patience is key here—let them cool down fully to ensure the frosting doesn’t melt when you apply it.
Step 5: Add the Hidden Gender Surprise
This is where the magic happens! Once your cakes are cooled, carefully cut a shallow well into the center of the first layer using a serrated knife. Be careful not to cut all the way through—just create enough space to hide your surprise! Fill this well with gender-specific confetti, candies, or sprinkles. This hidden surprise will create the wow factor when you cut into the cake!
Once the first layer is filled, place the second layer on top, pressing gently to make sure it sits securely.
Step 6: Frost Your Cake
Now, let’s make that cake look as amazing as it will taste! In a large bowl, beat the butter, powdered sugar, vanilla extract, and heavy cream until it reaches a creamy and fluffy consistency. This frosting should be easy to spread and pipe.
Using a spatula, spread a thin crumb coat over the entire cake. This helps seal in any crumbs and creates a smooth base for your final layer of frosting. Once your crumb coat is set, apply the final layer of frosting, smoothing it out to create a polished finish. If you prefer a more textured look, feel free to add some decorative swirls or rosettes with a piping bag.
Step 7: Decorate the Cake
The fun doesn’t stop with frosting! This is your chance to get creative with decorations. You can go for a simple yet elegant finish by adding a few edible sprinkles or glitter, or you can opt for a bolder design with decorative flowers, gender reveal toppers, or even a themed cake topper.
If you’re aiming for a more polished look, pipe rosettes or borders around the edges using a piping bag. The beauty of a gender reveal cake is that you can customize it to reflect your style and excitement for the big moment!
Step 8: The Big Reveal
When it’s time for the big moment, cut into the cake and watch as the colorful surprise spills out! It’s a heartwarming, joyous occasion as everyone finds out whether you’re expecting a little boy or girl. The excitement and reactions make this moment even more unforgettable.
And that’s it! From here on out, all you have to do is sit back and enjoy the praise for your beautiful, delicious, and memorable gender reveal cake. Have fun and savor every moment!
4. Pro Tips and Variations
Creating a gender reveal cake is an exciting way to share the joy of your baby’s arrival. Let’s dive into some professional tips and fun variations that will ensure your cake turns out perfect, whether it’s your first time baking or you’re an experienced baker.
Pro Tips for a Perfect Gender Reveal Cake
- Room Temperature Ingredients: For a fluffy, moist cake, always use room temperature ingredients. Make sure your butter, eggs, and milk have been out of the fridge for about 30 minutes before starting. This helps them blend smoothly into the batter, ensuring a soft texture.
- Sift Dry Ingredients: To avoid any lumps and ensure an even rise, sift your flour, baking powder, and salt. This simple step helps the dry ingredients mix better with the wet, creating a smooth batter.
- Check for Doneness: Baking times can vary, so always check your cakes 5 minutes before the suggested baking time. Insert a toothpick into the center of the cake—if it comes out clean or with just a few crumbs, it’s ready.
- Cooling is Key: Patience is important! Allow the cakes to cool in the pan for about 10 minutes before transferring them to a wire rack. This prevents the layers from breaking apart while cooling.
Fun Variations to Personalize Your Cake
- Flavor Twists: While a traditional vanilla cake works great, why not surprise your guests with unique flavors? Consider making a chocolate or lemon cake for a fresh twist. You can even make a fun rainbow-colored cake to add more excitement to the reveal.
- Frosting Ideas: Buttercream frosting is a classic, but you can try different options to complement the cake flavor. Whipped cream frosting gives a light, airy texture, while cream cheese frosting adds a tangy depth to the sweetness.
- Reveal Surprise: For an even more exciting reveal, add a hidden surprise inside the cake. You can bake colorful macaron layers or mini cupcakes inside the larger cake to add a fun touch to the gender reveal.
- Decorative Toppers: Don’t forget the decorations! Use fondant to create baby-themed shapes like pacifiers, strollers, or baby bottles. You could also add edible glitter or sprinkles to make the cake more visually stunning.
Special Dietary Variations
If you’re hosting guests with dietary preferences or restrictions, try these alternatives without sacrificing flavor:
- Gluten-Free: Use a gluten-free flour blend instead of regular flour, and ensure the blend includes xanthan gum to maintain the cake’s texture.
- Dairy-Free: For a dairy-free version, substitute butter with plant-based margarine or coconut oil, and use almond or oat milk instead of dairy milk.
Make Ahead Tips
If you’re busy or want to minimize stress on the day of the reveal, here are a few ways to prepare ahead:
- Bake the Layers Early: You can bake your cake layers 1-2 days in advance. Just wrap them tightly in plastic wrap and store at room temperature or in the fridge until you’re ready to frost them.
- Prepare the Frosting: Frosting can also be made ahead and stored in the fridge. Let it come to room temperature before using it for an even spread.
Storing Leftovers
If you have leftover cake after your celebration, here’s how to store it:
- Room Temperature: If you plan to finish it in a few days, store your cake in an airtight container at room temperature for up to 3-4 days.
- Freezing: For longer storage, freeze the cake slices in an airtight container or wrap them in plastic wrap and foil. You can keep it in the freezer for up to a month. Just let it thaw at room temperature before enjoying it.
With these pro tips and creative variations, you can ensure your gender reveal cake is both beautiful and delicious, adding extra joy to the special occasion!
5. Serving Suggestions
When it comes to serving your gender reveal cake, presentation is key! You want to ensure that your cake is not only delicious but also visually appealing for your guests to admire before the big reveal. Here are some thoughtful serving suggestions to make your cake shine:
1. Display It Creatively
- Place your gender reveal cake on a beautiful cake stand to elevate its presence.
- Surround the cake with coordinating décor that matches the theme of your reveal, whether it’s baby bottles, flowers, or gender-neutral elements.
- Add a sign or tag that says “Guess the Gender” to get guests involved before the moment arrives.
2. Cutting the Cake
- Have a designated moment during your party for the big reveal. You can cut the cake just after the gender is announced to add excitement.
- If you want to keep the reveal secret until the very end, keep the cake covered until you’re ready to slice it.
3. Pair with Complementary Treats
- Serve with simple, light snacks such as cupcakes, fruit, or cookies that match the cake’s colors. This will create a cohesive dessert spread that’s easy to enjoy.
- For a fun twist, offer gender reveal cupcakes or cookies with the same surprise filling, so everyone can enjoy a mini version of the excitement.
4. Perfect Drink Pairings
- Serve your cake with refreshing beverages like lemonade, iced tea, or sparkling water to complement the sweetness.
- For a more festive vibe, create a “gender reveal punch” (blue or pink depending on the reveal) for your guests to enjoy alongside the cake.
5. Have Fun with the Colors
- The fun doesn’t stop with the cake! Serve drinks or side dishes in the same theme color. You could also choose napkins and plates that fit your gender reveal palette to tie the entire spread together.
By focusing on presentation and pairing the cake with complementary treats and drinks, you can enhance the experience of your gender reveal cake and create a celebration that is as delicious as it is memorable.
6. Conclusion
Congratulations! You’ve just created the perfect gender reveal cake, and you’re ready to surprise your friends and family with a show-stopping moment. This recipe is not just about the cake; it’s about creating a memorable experience that everyone will cherish. Whether you’re welcoming a little boy or girl into the world, your cake will be the centerpiece of this exciting reveal.
Here’s a quick recap of what makes this gender reveal cake so special:
- Easy-to-follow recipe: From the moist cake layers to the colorful filling, this recipe is perfect for both beginners and experienced bakers.
- Versatile: Customize your cake’s flavor and design to match your celebration theme.
- Show-stopping reveal: The hidden color inside the cake makes for a dramatic and exciting moment during your event.
We hope this gender reveal cake brings joy and excitement to your big day! Whether you’re hosting an intimate gathering or a large celebration, it’s sure to be the highlight of the event. Remember, it’s the love and effort you put into the celebration that truly counts, and a cake like this adds a sweet, personal touch to your announcement.
If you enjoyed making this cake, feel free to share your creation on social media and tag us. We’d love to see how your gender reveal cake turned out and how you made it your own!
Happy baking, and here’s to a sweet and unforgettable reveal!
————————————————-
Gender Reveal Cake
Ingredients
Cake Layers:
- 2 ½ cups all-purpose flour – This will form the base of your cake giving it that soft, fluffy texture everyone loves.
- 2 ½ teaspoons baking powder – Essential to make sure the cake rises properly and stays light.
- ½ teaspoon salt – A little salt to balance the sweetness.
- 1 cup unsalted butter softened – This is key to creating a moist, tender cake.
- 2 cups granulated sugar – To sweeten the cake and help it rise beautifully.
- 4 large eggs – These bind everything together and help the cake structure.
- 1 teaspoon vanilla extract – Adds a warm sweet flavor to enhance the overall taste.
- 1 cup whole milk – This adds moisture to the cake layers for an irresistible soft texture.
- Blue or pink food coloring – The star of the show! Choose either color to surprise everyone with the gender reveal inside the cake. Gel food coloring works best for a vibrant pop.
Frosting:
- 1 cup unsalted butter softened – The creamy base for the perfect frosting.
- 4 cups powdered sugar – Gives the frosting its fluffy sweet texture and stability.
- 2 teaspoons vanilla extract – Adds a rich flavor to balance the sweetness.
- 2-4 tablespoons heavy cream – Adjust for the ideal frosting consistency—smooth and easy to spread!
- Pinch of salt – Just a touch to balance the sweetness of the frosting.
Surprise Filling:
- Candy sprinkles, or colored sugar (blue or pink) – The best part! When you cut into the cake, the filling will reveal the gender surprise. You can also use confetti for a fun twist.
- Optional Decorations:
- Edible glitter or metallic sprinkles – Add a little sparkle to your cake for a festive look.
- Fresh flowers or personalized toppers – Give your cake a unique touch that will wow your guests.
- With all these ingredients lined up you’re ready to bring this delicious creation to life! Just remember, every step counts in making this a showstopper, so take your time and enjoy the process. Now, let’s dive into the next section: How to make this cake magic happen!
Instructions
Step 1: Prepare Your Cake Pans
- Start by preparing two 8-inch round cake pans. Lightly grease them with butter or cooking spray, then dust them with flour, or line the bottom with parchment paper. This ensures your cake layers won’t stick, making them easier to remove and frost. Properly greased pans will help you achieve smooth, beautiful layers.
Step 2: Mix the Cake Batter
- In a medium bowl, whisk together your flour, baking powder, and salt. This step helps evenly distribute the dry ingredients, ensuring a light and fluffy cake texture.
- In a large mixing bowl, beat butter and sugar until the mixture is light and fluffy. This should take about 3 minutes. Add the eggs, one at a time, and continue beating to incorporate them fully. Don’t forget the vanilla extract for that extra burst of flavor. Once your wet ingredients are combined, it’s time to add the dry ingredients and the milk.
- Alternate adding the dry ingredients and the milk to the butter mixture, beginning with the dry ingredients. Mix just until combined—overmixing could make your cake dense.
Step 3: Add the Color
- Now, divide the batter evenly into two bowls. Add a few drops of blue or pink food coloring to one of the bowls, depending on whether you’re revealing a boy or a girl. Stir gently to ensure the color is evenly mixed. This adds a fun surprise element and sets the tone for your reveal!
Step 4: Bake Your Cake Layers
- Pour the colored batter into your prepared pans, alternating between the pink and blue batter if you wish to create a marbled effect, or simply pour them in separately. Tap the pans gently on the counter to remove any air bubbles.
- Bake your cakes at 350°F (175°C) for about 25-30 minutes. You can check for doneness by inserting a toothpick into the center—if it comes out clean, your cakes are ready.
- Allow your cakes to cool in the pans for about 10 minutes, then transfer them to a wire rack to cool completely before frosting. Patience is key here—let them cool down fully to ensure the frosting doesn’t melt when you apply it.
Step 5: Add the Hidden Gender Surprise
- This is where the magic happens! Once your cakes are cooled, carefully cut a shallow well into the center of the first layer using a serrated knife. Be careful not to cut all the way through—just create enough space to hide your surprise! Fill this well with gender-specific confetti, candies, or sprinkles. This hidden surprise will create the wow factor when you cut into the cake!
- Once the first layer is filled, place the second layer on top, pressing gently to make sure it sits securely.
Step 6: Frost Your Cake
- Now, let’s make that cake look as amazing as it will taste! In a large bowl, beat the butter, powdered sugar, vanilla extract, and heavy cream until it reaches a creamy and fluffy consistency. This frosting should be easy to spread and pipe.
- Using a spatula, spread a thin crumb coat over the entire cake. This helps seal in any crumbs and creates a smooth base for your final layer of frosting. Once your crumb coat is set, apply the final layer of frosting, smoothing it out to create a polished finish. If you prefer a more textured look, feel free to add some decorative swirls or rosettes with a piping bag.
Step 7: Decorate the Cake
- The fun doesn’t stop with frosting! This is your chance to get creative with decorations. You can go for a simple yet elegant finish by adding a few edible sprinkles or glitter, or you can opt for a bolder design with decorative flowers, gender reveal toppers, or even a themed cake topper.
- If you’re aiming for a more polished look, pipe rosettes or borders around the edges using a piping bag. The beauty of a gender reveal cake is that you can customize it to reflect your style and excitement for the big moment!
Step 8: The Big Reveal
- When it’s time for the big moment, cut into the cake and watch as the colorful surprise spills out! It’s a heartwarming, joyous occasion as everyone finds out whether you’re expecting a little boy or girl. The excitement and reactions make this moment even more unforgettable.
- And that’s it! From here on out, all you have to do is sit back and enjoy the praise for your beautiful, delicious, and memorable gender reveal cake. Have fun and savor every moment!
Notes
- Calories: 350 kcal
- Fat: 15g
- Saturated Fat: 9g
- Cholesterol: 85mg
- Sodium: 220mg
- Carbohydrates: 45g
- Sugar: 30g
- Dietary Fiber: 1g
- Protein: 5g
7. FAQs
Planning a gender reveal cake can come with some questions, and we’re here to help! Below are some frequently asked questions that will make your cake journey even easier:
1. Can I make a gender reveal cake ahead of time?
Absolutely! You can bake and assemble your gender reveal cake a day or two in advance. Just make sure to store it properly in an airtight container or wrap it tightly in plastic wrap to maintain freshness. For the best results, add any fresh decorations like whipped cream or frosting closer to serving time.
2. What’s the best way to reveal the gender without a mess?
If you want to avoid a messy situation, opt for a gender reveal cake with colored frosting inside, rather than liquid filling. Simply slice into the cake to reveal the surprise! Using a firm yet moist cake will also help reduce crumbling during the cut.
3. Can I make a gender reveal cake with multiple layers?
Of course! In fact, layered cakes can make for a stunning reveal. You can create a cake with alternating layers of different colored batter, or use hidden layers of colored frosting or sprinkles to create a more dramatic effect when you slice into it.
4. How do I make sure the color inside the cake is vibrant?
Using gel food coloring rather than liquid coloring will give your cake the most vibrant hue. Gel food coloring is more concentrated and will ensure that your gender reveal cake is bold and bright, without affecting the texture of the cake.
5. What should I do if the cake falls apart when cutting?
Don’t panic! If your cake is too soft and crumbles when cutting, it could be a sign that it wasn’t cooled properly before slicing. Let the cake cool completely before cutting, and if necessary, use a serrated knife to make cleaner cuts. It’s also helpful to use a sturdy cake recipe to prevent crumbling.
6. Can I customize the cake flavor?
Definitely! While classic vanilla and chocolate are popular, you can customize the flavor of your gender reveal cake to match your preferences. From red velvet to funfetti or even something more adventurous like lemon or coconut, the choice is yours! Just keep in mind that strong flavors may interfere with the coloring effect inside.
7. Can I make the cake gluten-free or dairy-free?
Yes! You can easily adapt your gender reveal cake recipe to fit dietary preferences. There are many gluten-free and dairy-free baking alternatives available, so make sure to choose a recipe that accommodates your guests’ needs. Just be aware that texture and baking times may vary, so be sure to follow specific instructions for these adaptations.With these FAQs, you’re all set to create a gender reveal cake that will delight your guests and provide a memorable moment for everyone involved. Whether you’re making the cake ahead of time, choosing the best cake flavor, or customizing for dietary needs, we’ve got you covered! If you have any more questions, feel free to leave them in the comments – we’re here to help!